Is there anything better than slow Roasted Rotisserie Style Sticky Chicken? The kind you get at your favorite restaurant. Well with a little prep, and about 5 hours of cooking time, you can have it right at home!
I absolutely adore rotisserie chicken. The finger licking flavors that are embedded into each savory bite. (I drool just thinking about it! That could just be an age thing? Lol)
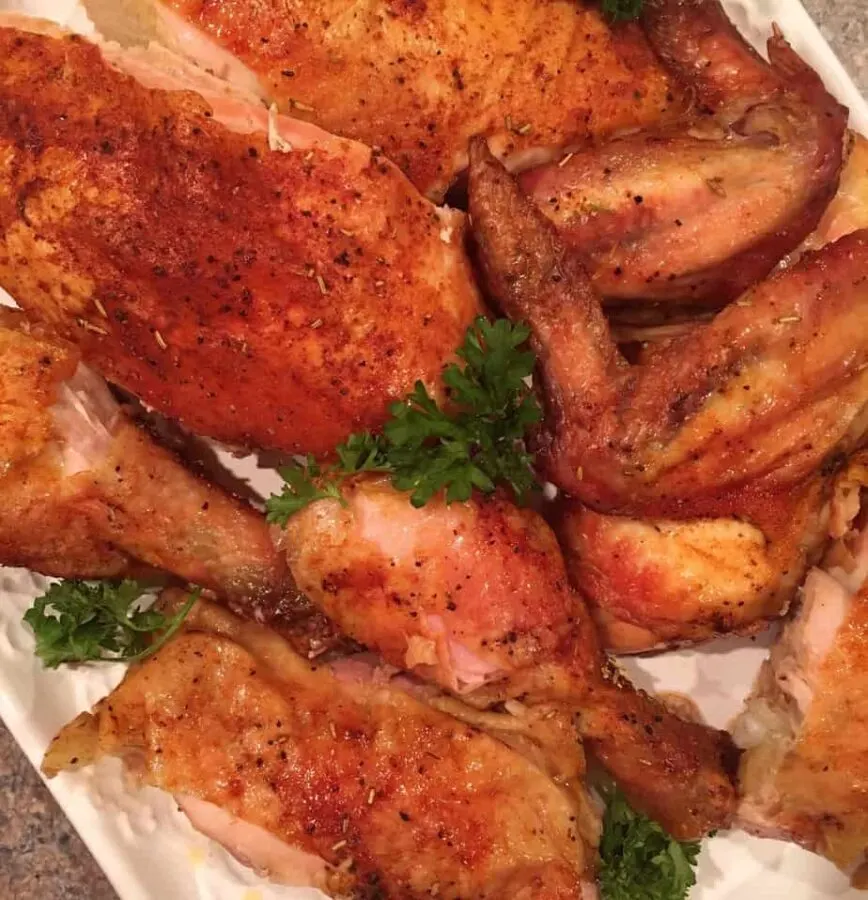
Several years ago, I was looking for the perfect recipe for Roasted Chicken and ran across this beauty from Allrecipes.com. Trust me when I say…it’s PERFECT!
The original recipe calls for two chickens. With just two of us in the Nest… I make one chicken. (I used to make two. The leftovers are perfect for casseroles or chicken salad sandwiches.)
TIP: The secret to this luscious chicken are two-fold. One… it’s the amazing spice rub and allowing it to marinate overnight for 4 -6 hours. The second is slow roasting it for hours WITHOUT peeking!
So let’s get started…
How To Make Roasted Rotisserie Style Sticky Chicken
You’ll need one, or two, big plump chickens. (Mine here is named “Fred”! I left Ethel in the Freezer. Lol) Remove and discard giblets from chicken. (That’s right…reach on in there and grab them puppies! Close your eyes if ya have to!)
Rinse the chicken cavity, and pat dry. (Hold on to him…he’s slickery when he’s wet!)
TIP: I like to place mine on a clean cotton flour sack towel. It makes clean up a breeze!
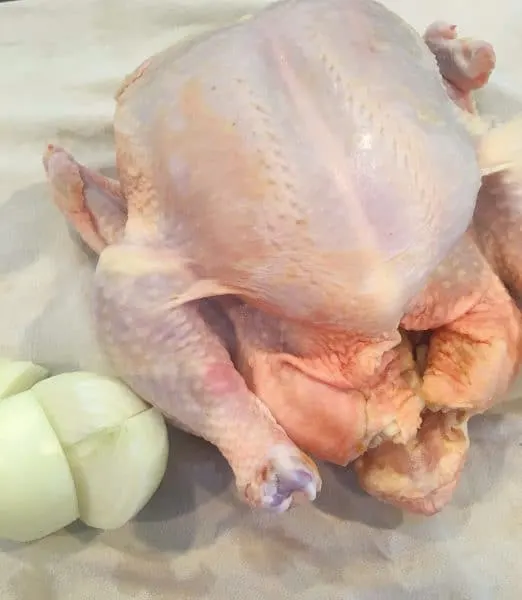
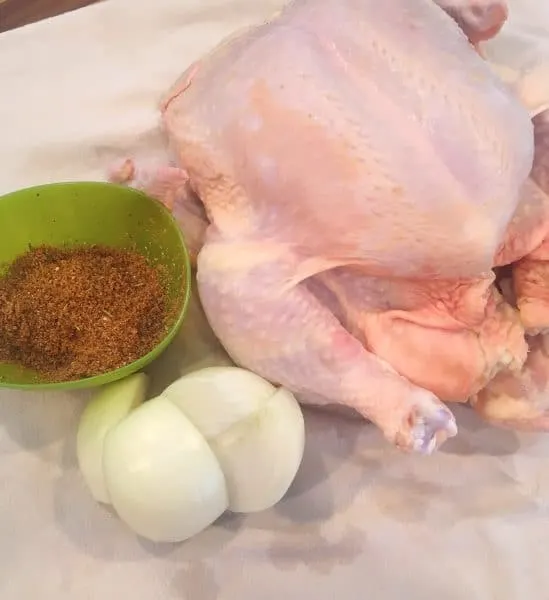
Quarter one white onion per chicken. In a small bowl mix together 4 teaspoons of salt, 2 teaspoons paprika, 1 teaspoon onion powder, 1 teaspoon dried thyme, 1 teaspoon coarse black pepper, 1/8 teaspoon cayenne pepper (optional), 1/2 teaspoon garlic powder, 2 Tablespoon Brown Sugar. (Keep in mind this is enough seasoning for TWO CHICKENS)
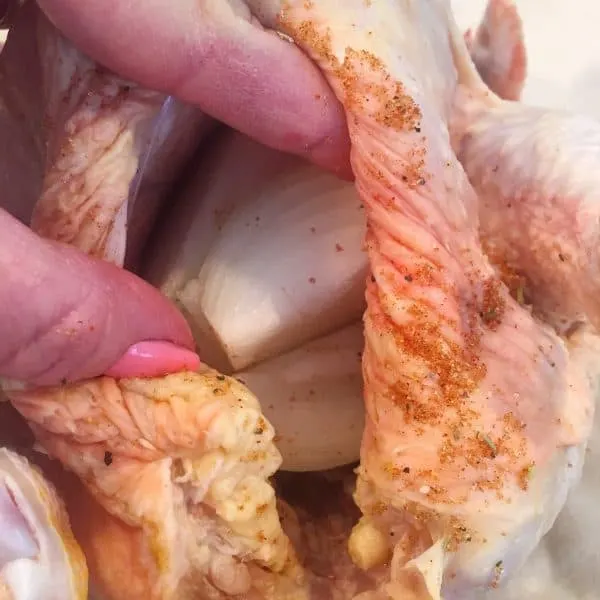
It’s chicken massage time! Whoop-Whoop! (Never thought you’d envy a chicken did ya?)
Rub each chicken, inside and out, with the spice mixture. Make sure to get into all the nooks and crannies of the wings and leg joint area. This is a full-blown massage my friends! (Now you know why I said to use a flour sack towel…that seasoning rub is messy!)
Place 1 onion into the cavity of each chicken. (This adds extra flavor and keeps the shape of the chicken during roasting)
Place chickens in a resealable bag or double wrap with plastic wrap. Place in a shallow baking dish and refrigerate overnight, or at least 4 to 6 hours.
I’ll admit I didn’t marinate my “Fred”. However, I usually do, and it adds so much more flavor. So I highly recommended that “chill” time!
Preheat oven to 250° degrees.
Unwrap chicken and place in a roasting pan on a rack.
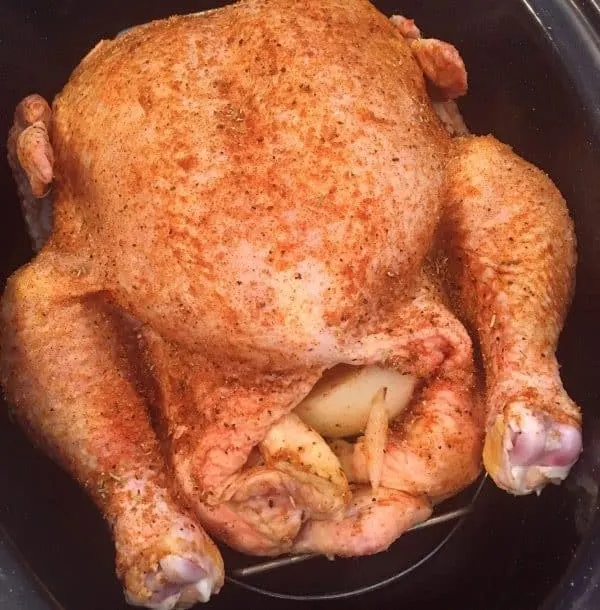
Can you see how my “Fred’s” legs are touching the sides of my small roasting pan? We can’t have that! That wonderful skin will stick to the pan.
TIP: Here’s a little trick to prevent that from happening. I crumble up foil and place it between the chicken and the pan.
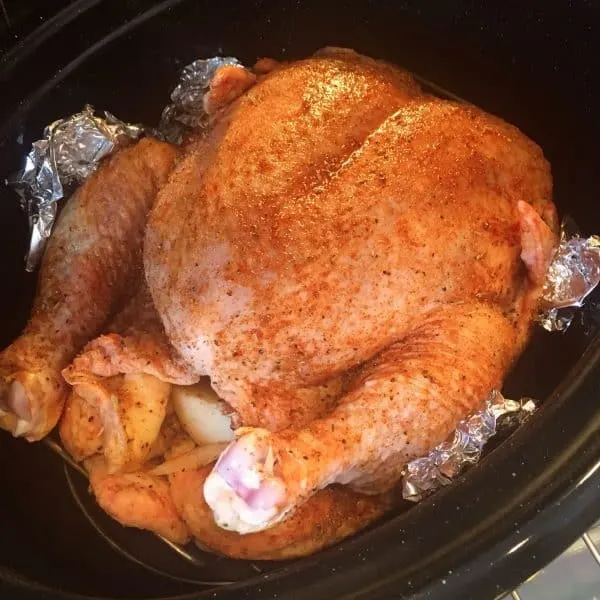
Bake chicken for 5 hours, to a minimum internal temperature of 180 degrees.
It’s important that you DO NOT OPEN THE OVEN during baking! Don’t you do it! I know…the house smells heavenly and you’re drooling all over yer self! (Too BAD! Be strong! You can do it my chicken Momma’s)
Someone is going to want to open that oven. It happens every time at this Nest. I finally took to leaving a note of “death” on the oven door! (I take roasting chickens very seriously! Lol)
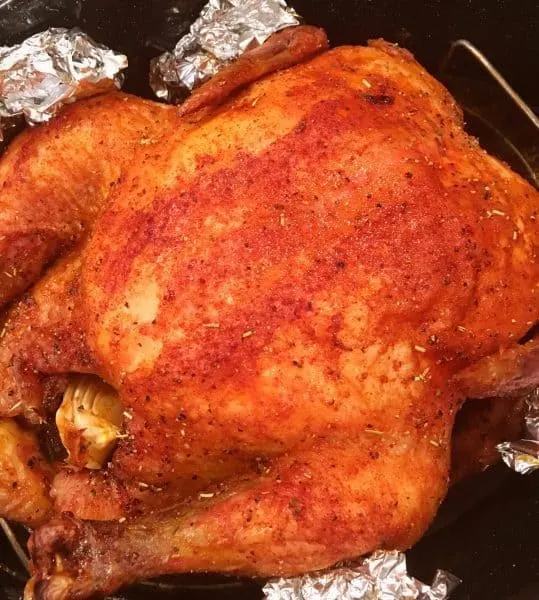
Look at all that crispy sticky skin! The juices are sealed in there just waiting to burst forth.
Let the chicken stand for 10 minutes before carving. We want all those juices to go back into the meat!
Using a sharp carving knife carve the roasted chickens.
I start by gently pulling the legs away from the body of the chicken and then making a cut right down by the thigh joint.
Same with the wings. I carve the breasts by cutting down the side of breastbone on each side.
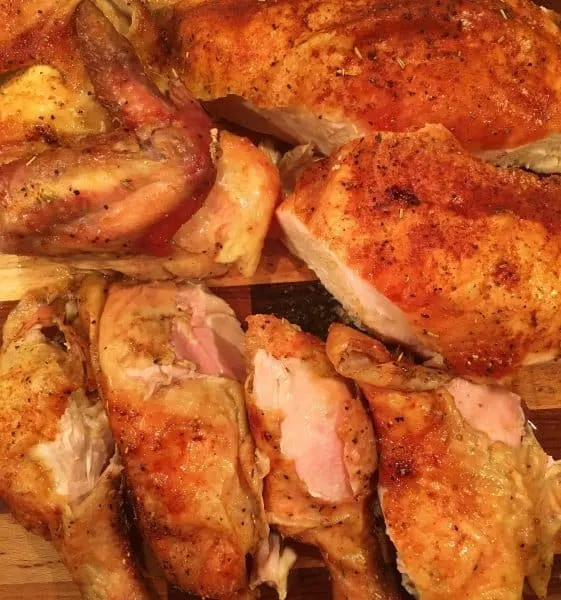
I know it’s not sanitary…but I double dog dare ya to cut this chicken up without licking your fingers.
You can’t do it!!! No one can! It’s just CRAZY good!
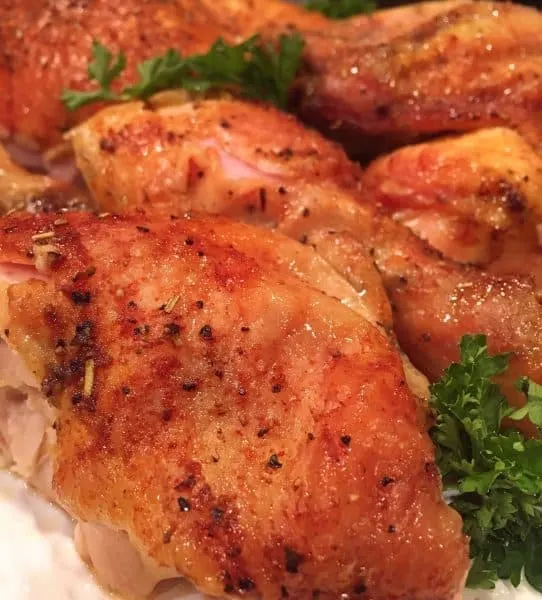
The flavors from the spice rub are spectacular on this Roasted Chicken!
It truly is a combination of the spices and the slow roasting that make this chicken the VERY Best Roasted Rotisserie Style Chicken you’ll ever have!
I love to serve this perfect Roasted Chicken with mashed potatoes and green beans. The drippings from the chicken make a wonderful gravy!
This is a great weeknight dinner. The leftovers are as great as the first day. It’s also an amazing Sunday dinner!
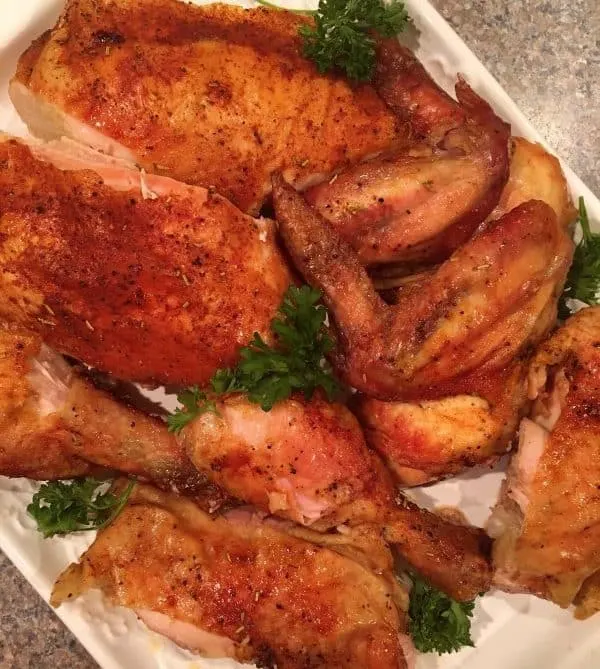
I know the chicks at your Nest will love this tasty “bird” as much as we do! (That really sounds wrong?) Eh… Enjoy!
If you enjoyed this recipe you might like these other yummy Chicken Recipes
- Chicken Florentine Casserole
- Chicken Fried Chicken with Creamy Country Gravy
- Poppy Seed Chicken Skillet Dinner
- Chicken Ranch Tater Tot Casserole
- Chicken Biscuit Pot Pie
Remember I’d love to have you join my tribe of foodie friends and follow me on Facebook, Twitter, Instagram, and Pinterest. Where I share my love of all things “food” every day!
Happy Nesting! Have a Great Day!


Roasted Rotisserie Style Sticky Chicken
Ingredients
- 4 teaspoons salt
- 2 teaspoons paprika
- 1 teaspoon onion powder
- 1 teaspoon dried thyme
- 1 teaspoon coarse black pepper
- 1/8 teaspoon cayenne pepper optional
- 1/2 teaspoon garlic powder
- 2 Tablespoons Brown Sugar
- 2 onions peeled and quartered
- 2 4 pound whole chickens
Instructions
- In a small bowl, mix together salt, paprika, onion powder, thyme, black pepper, cayenne pepper, garlic powder, and Brown Sugar.
- Remove and discard giblets from chicken. Rinse chicken Cavity, and pat dry with paper towels.
- Rub each chicken inside and out with spice mixture. Place 1 onion into the cavity of each chicken.
- Place chickens in a resealable bag or double wrap with plastic wrap and place in a shallow baking dish. Refrigerate overnight, or at least 4-6 hours.
- Preheat oven to 250° degrees.
- Place chickens in a roasting pan on top of a roasting rack. Place foil balls between legs and side of roasting pan if touching. Bake uncovered for 5 hours, to a minimum internal temperature of 180°. Do NOT OPEN OVEN DURING BAKING.
- Let chickens stand for 10 minutes before carving.

Miranda
Friday 26th of July 2019
Do you think a rack on a different kind of pan would work? I don’t have a roasting pan
[email protected]
Friday 26th of July 2019
Hi Miranda! Yes another type of pan would work for this recipe. Just make sure it is deep dished to catch all the drippings from the chickens as they roast. You can also make this recipe in a slow cooker. Just place the chicken on top of foil balls that are on the bottom of the pan.The chickens do need to be raised from the bottom of the pan so that the juices can run under the chickens as they cook. Hope this helps. Thanks so much for stopping by! Have a GREAT weekend. Happy Nesting! ~Norine
Cshellz
Thursday 8th of November 2018
Is there some 'formula' for timing? (like regular roasting is done at 20 min/lb) This is for 2 four lb. birds (so time in this recipe is for 4 lbs or 8lbs of meat?) I bought a lovely single chicken thats about 6 lbs....or is it just 5 hours no matter what--1 or 2 birds...any lbs? Thanks. Love your recipes....
[email protected]
Friday 9th of November 2018
Hi! There may be some secret formula for timing when it comes to chicken...however, with this recipe I've always found the 5 hours is perfect regardless of the size of chicken I have used. Now, if the chicken you buy is extremely hearty and resembles a Turkey...lol...I would for sure cook it longer. The beauty of this recipe is that the low temp really allows just about any size chicken to cook perfectly. My daughter just made this for her family and her 3 year old ate three legs and told her Mommy "This is the BEST dinner Mommy!" I don't think a better endorsement can be found. ;) Thanks so much for stopping by and it was a great question. I have no doubt that if you were cooking for a shorter time period in a hotter oven then the concerns of weight would apply. However, like I said, 5 hours on this temp is going to produce the perfect chicken dinner. Have a GREAT weekend. Happy Nesting! ~Norine
Cshellz
Thursday 20th of September 2018
This looks wonderful...have 2 questions tho. You said you left Ethel in the freezer for next time--was this chicken frozen or frozen/thawed or still fresh? (Don't imagine at that low temp doing a frozen bird would be ok--too long at low temp.??) Also, did you cook this covered with foil or a lid for all or part of the time? Cant wait to try this one...Thanks very much!!
[email protected]
Thursday 20th of September 2018
Hi! I buy my whole chickens at Costco and they come two to a package. Each are individually wrapped. So I just pulled one out of the freezer and defrosted it and left "Ethel" in the freezer for another day. lol Sorry about that. Second question...I do not cover the chicken at all! The entire time it is left uncovered in the oven to cook. It gives it that crispy sticky skin. It's absolutely perfect. I promise! Remember you can do two chickens if you want. I just did one because there is only two of us left at home. Back in the day...I did both chickens. Thanks so much for stopping by and I hope you enjoy this recipe as much as we do. Have a GREAT weekend! Happy Nesting! Norine
Pat in CO
Thursday 22nd of February 2018
I am trying to form my perfect Rotisserie seasoning and find all the recipes way too salty. Smoked sweet Paprika did wonders but still too salty. And I love salt! The brown sugar looks interesting. What does it add? BTW, small eaters so we basically sprinkle seasoning on 2-4 chicken Thighs
[email protected]
Thursday 22nd of February 2018
Hi Pat! It adds a little sweet to help off set the salty taste. You could always cut the salt in half if it is too salty for you. I understand about the seasonings being too salty. I know the salt helps draw the moisture out of the skin and make it "crispy" but I think it would be fine. Hope that helps? Thanks for stopping by and visiting. I truly appreciate it. Have a Great Week! Norine