


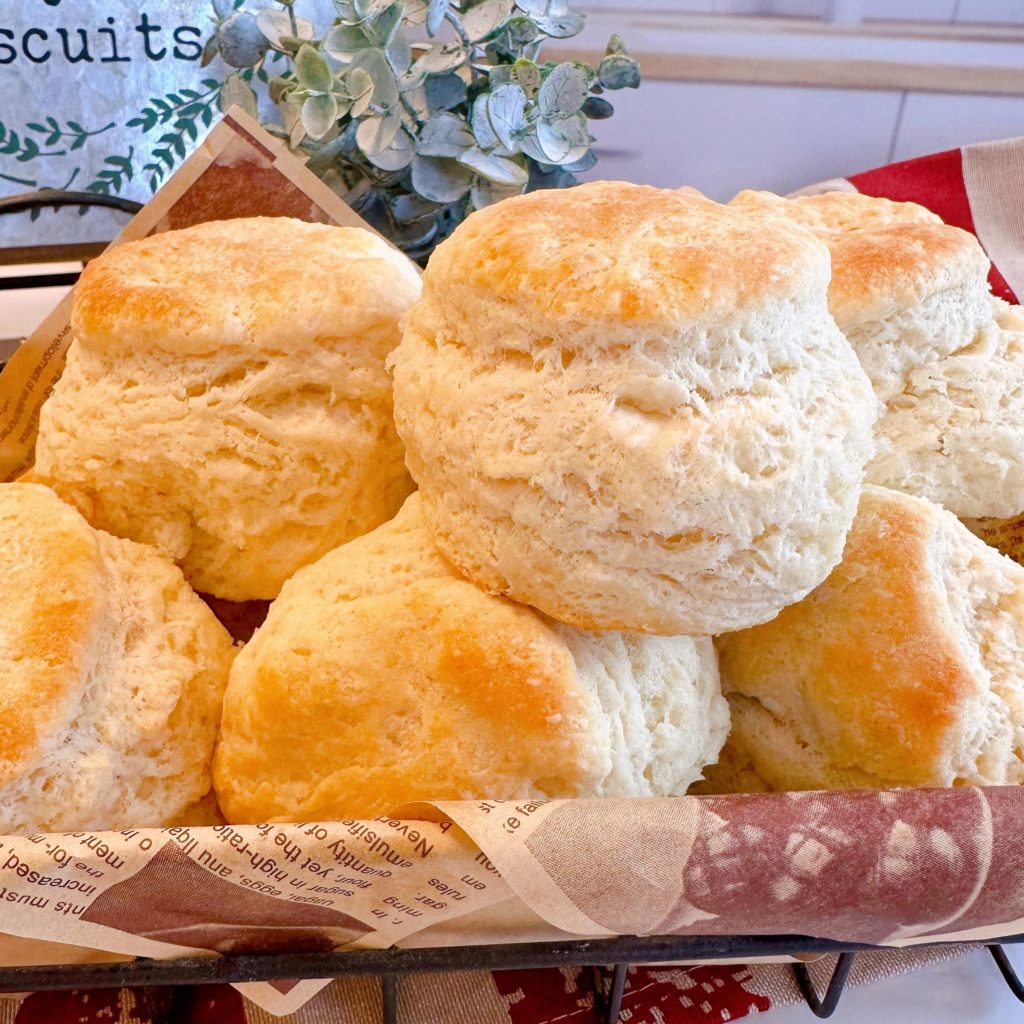
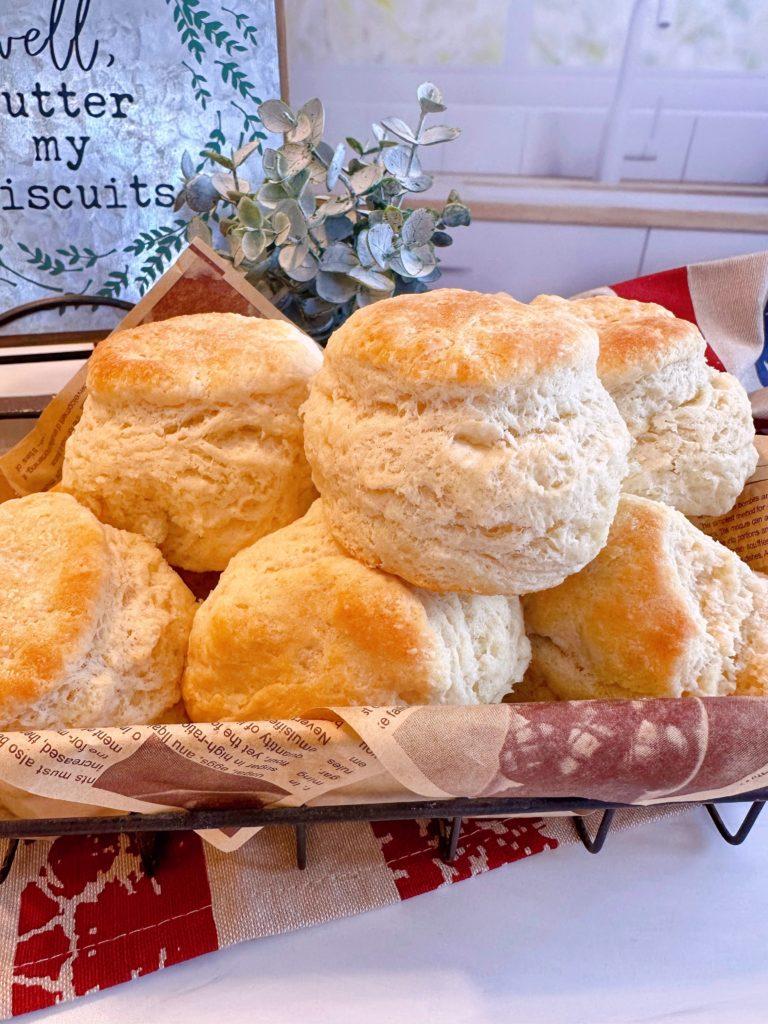
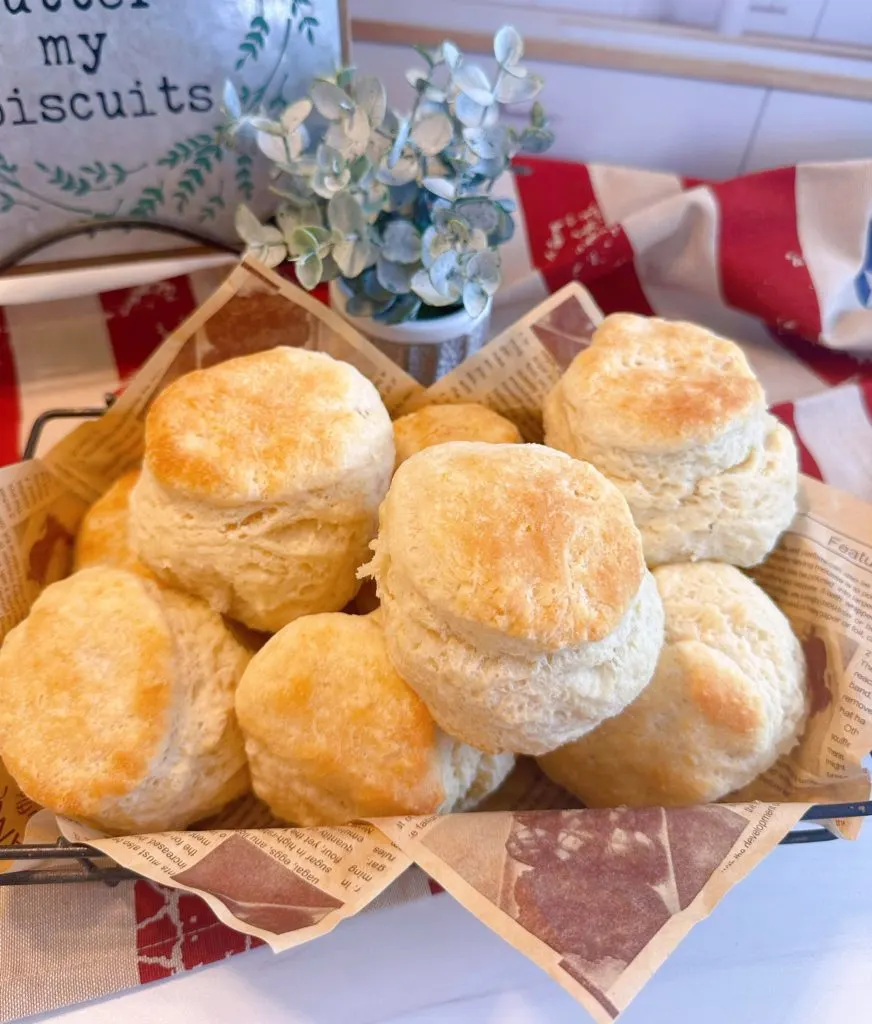
There’s nothing better on your dinner or breakfast table than a basket full of big fluffy, tender, buttery, golden Homemade Baking Powder Biscuits!

Reader’s Comment- “Girl!!!! These are just like Granny’s amazing biscuits! Yours look like heaven! I could almost smell all that biscuit goodness!”-GM
Updated: January 29, 2025
For weeks, I’ve been promising to post my Basic Biscuit recipe! Today is the day! I’m pretty excited about sharing these big pillows of happiness with you! (Biscuits are JOY!)
Baking Powder Biscuits are a favorite at this Nest. In fact…my family recently told me that they’d rather have biscuits with a meal than rolls! (SAY WHAT?!!!)
I love both…but I’m President of the National Carb Lovers Society! It’s expected! Honestly, when I die…just please bury me with doughnuts, rolls, pancakes, cake, muffins, bread, AND… Biscuits! (You could throw a few cheetos on top for good measure and don’t forget a Dr Pepper!)
Let me show you how easy it is to create the BEST biscuits EVER!
Ingredients Needed
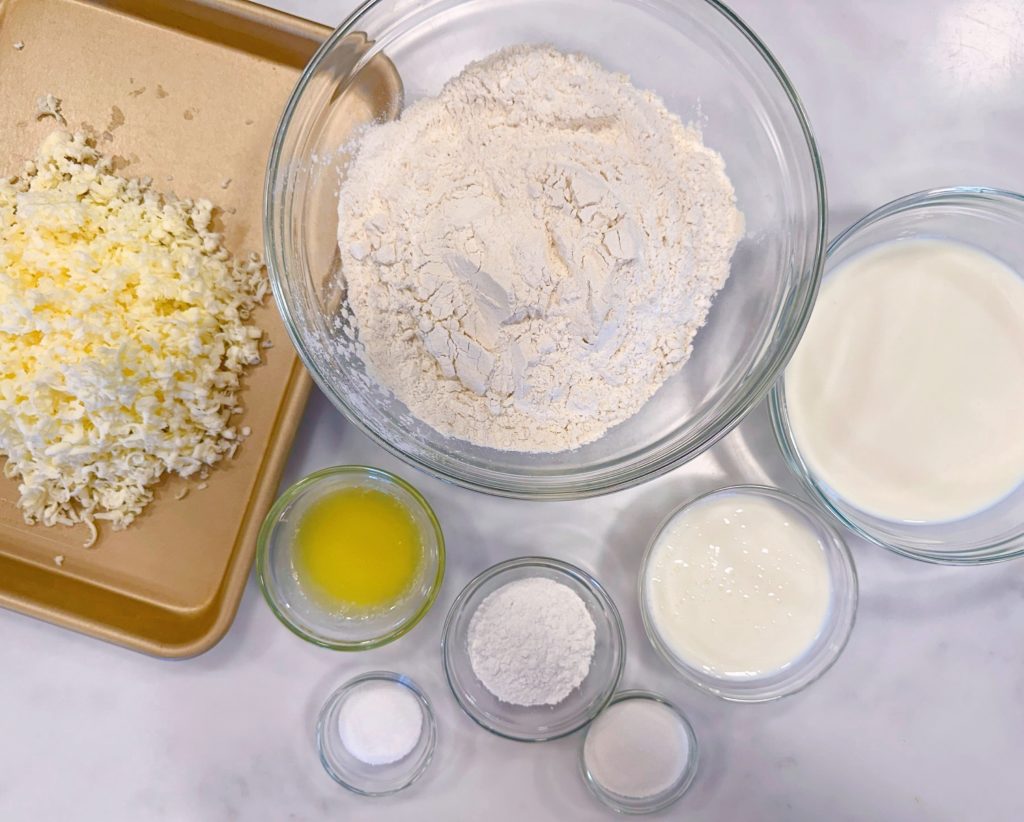
- 4 cups all-purpose flour
- 2 tablespoons baking powder
- 2 tablespoons of sugar
- 2 teaspoons salt
- 2/3 cups butter, frozen and grated, or ice-cold cut into small cubes
- 1½ cups milk – 2% or whole milk
- ½ cup buttermilk
- 2 tablespoons butter, melted – to brush on top of the biscuits

How to Make Biscuits
This recipe will make about 2 dozen biscuits, or a dozen JUMBO biscuits! (Remember I said the birds at this Nest L.O.V.E. biscuits!) You can cut this recipe in half, with no problem and get between 6–12 biscuits depending on the size of your biscuit cutter!
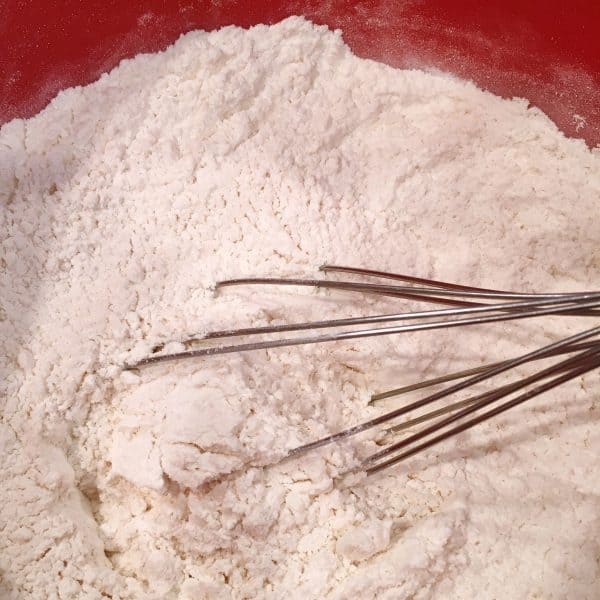
In a large bowl, whisk together 4 cups of flour, 2 Tablespoons of sugar, 2 Tablespoons of baking powder, and 2 teaspoons of salt.
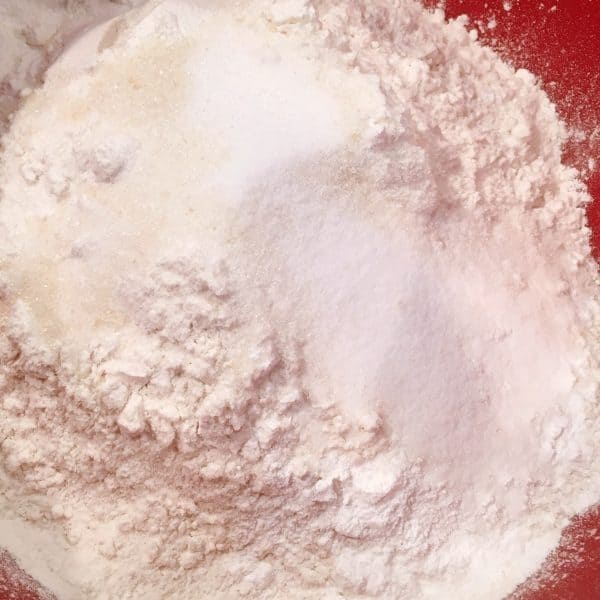

TIP: Using a wire whisk to mix the dry ingredients creates the same effect as “sifting” the dry ingredients. It will help create the fluffiest biscuit!

Cutting Butter into Biscuit Dough
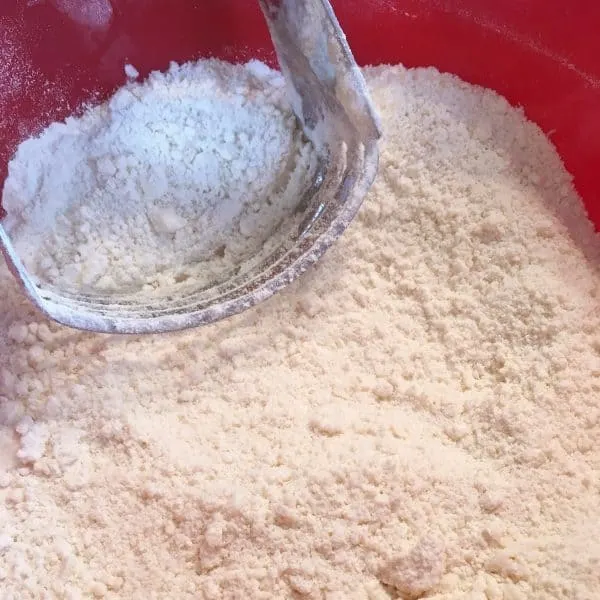
First, there are several different ways to cut the butter into the flour mixture. My preferred method is to grate frozen butter, it is easier to grate the frozen, and add the grated bits into the flour mixture. You can also use cold butter, cut into cubes. Either will work.
I prefer a wire pastry blender, but the newer style, like in the photo below, works well too.
TIP: The original recipe for these biscuits called for 1/3 cup butter and 1/3 cup shortening. However, over time, I have come to learn that using ice-cold butter creates more flaky layers. Either will work, but for the best possible outcome, I highly recommend using butter.
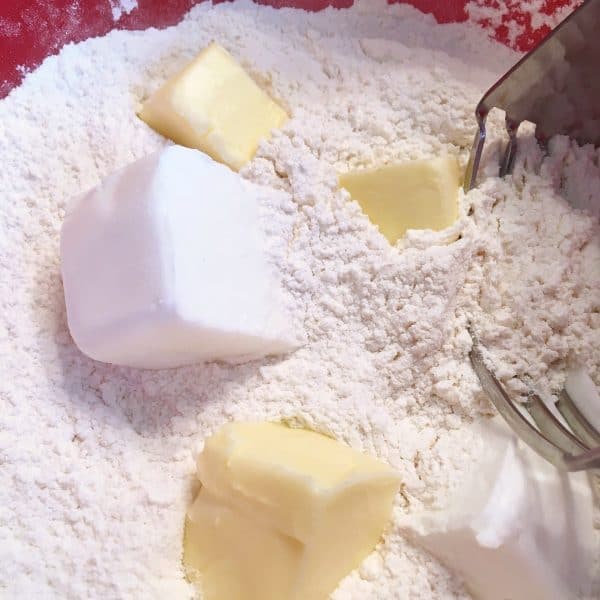

Cut the butter into the flour until it resembles a coarse meal similar to boxed Bisquick.

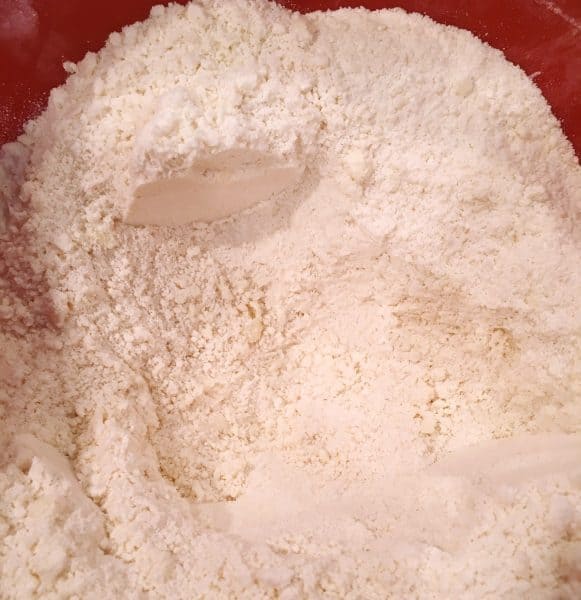
Combining wet and dry ingredients
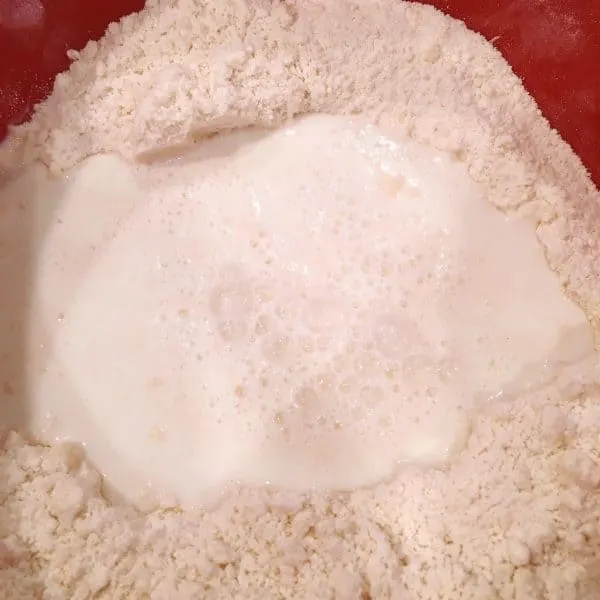
Make a well, or hole, in the center of the biscuit mix for the liquids.
This is a great tip for mixing the wet with the dry. It makes it so much easier to blend the two together. Over mixing can make your biscuits tough!

Pour 1½ cups of milk and ½ cup of buttermilk into the well.
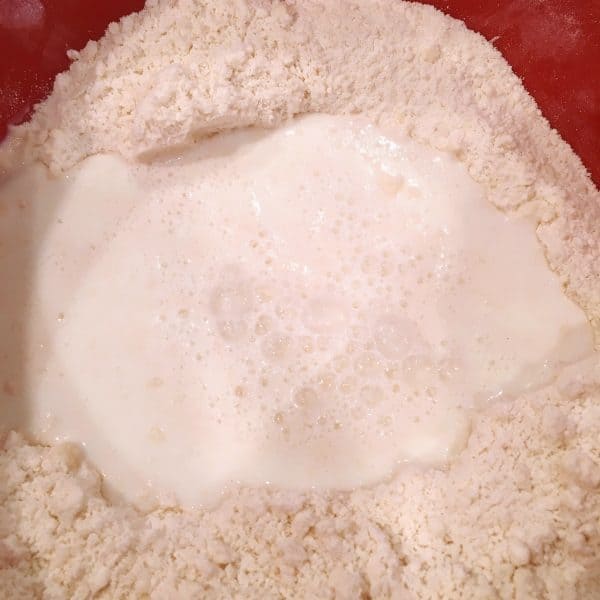
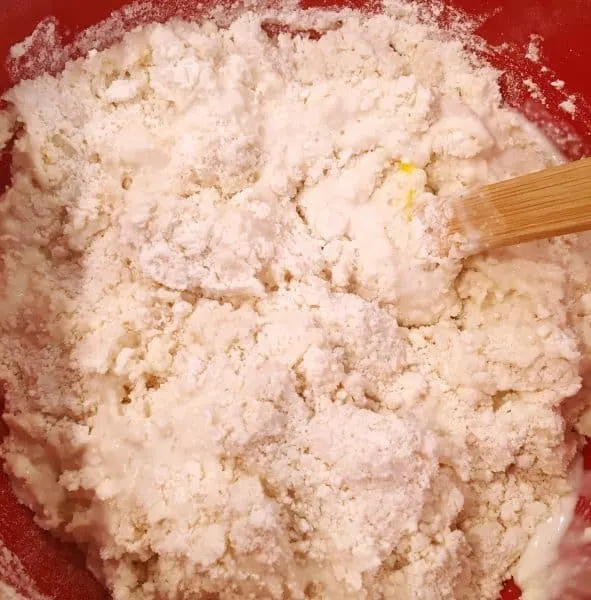
Using a rubber spatula, carefully mix the wet ingredients into the dry until the dough begins to pull away from the sides of the bowl! DO NOT OVER MIX THE DOUGH! (Do I have your attention? Did ya get that? I don’t want you to over mix the dough…lol)
Your dough will be wet and sticky. That’s perfect!
TIP: Truly, for the BEST BISCUITS, the less you handle the dough the better!

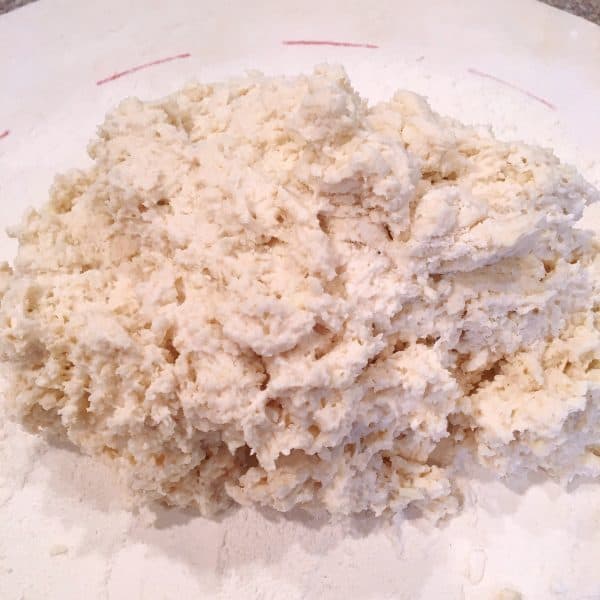
Turn the dough out onto a well floured surface.
Notice the dough is still sticky and not perfectly blended. The majority of the flour should be incorporated, but not all of it. That’s exactly how you want your dough to look. Gently fold it over and press down. Knead it 8–10 times, until the outside is no longer sticky.
That’s ALL! Do not over knead your biscuit dough.
Again…DO NOT OVER HANDLE THE DOUGH! (Yep, I’m going to keep yelling that! I’m used to doing this… I’m a Mom… Hearing myself speak is normal!)

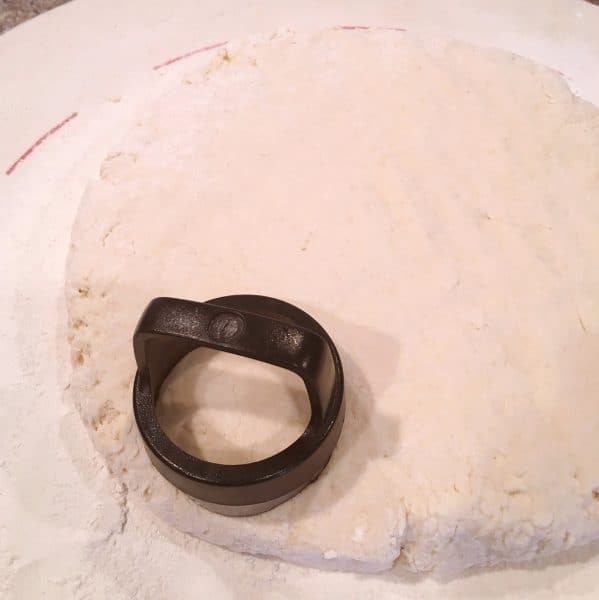
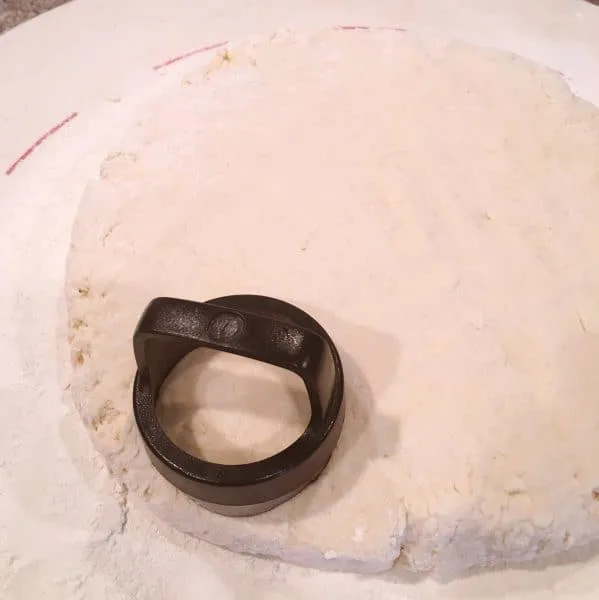
Pat the dough into a large circle about one inch thick. Don’t roll it. Just pat it gently into a circle.
The dough should be at least an inch thick! Yep! That’s thick! We make big, thick, fluffy biscuits. If you want Mamsy-Pamsy biscuits…you need to go knocking at another door! These are biscuits you can sink your teeth into and have yer eye’s rollback into yer head!
TIP: For larger, taller biscuits, the dough should be about 1 inch thick. If you want them thinner, pat the dough to about ½ inch thick. The dough will double during baking.
Using a biscuit cutter, OR a biscuit cutter masked as a “round cookie cutter” (I know…some of ya only use it to make those big thick sugar cookies with pink frosting!)… cut the biscuits out by dipping the cutter into flour first, then placing it as close to the edge of the dough as possible and pressing down.
Repeat over and over, flour and cut, cutting each biscuit as close to the other as possible.
TIP: If you don’t have a biscuit cutter you can use a juice glass turned upside down. Just be sure to flour it each time before cutting.
For the leftover dough pieces, pat back into another circle and continue to cut out biscuits until all the dough has been made into biscuits.
TIP: You can just use a knife and cut the biscuits into squares, and you won’t have to dirty a biscuit cutter, or gather up the scraps to continue cutting out biscuits.
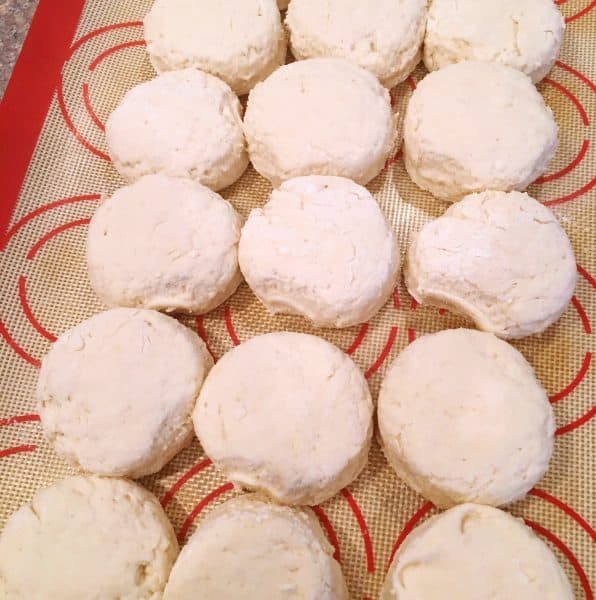
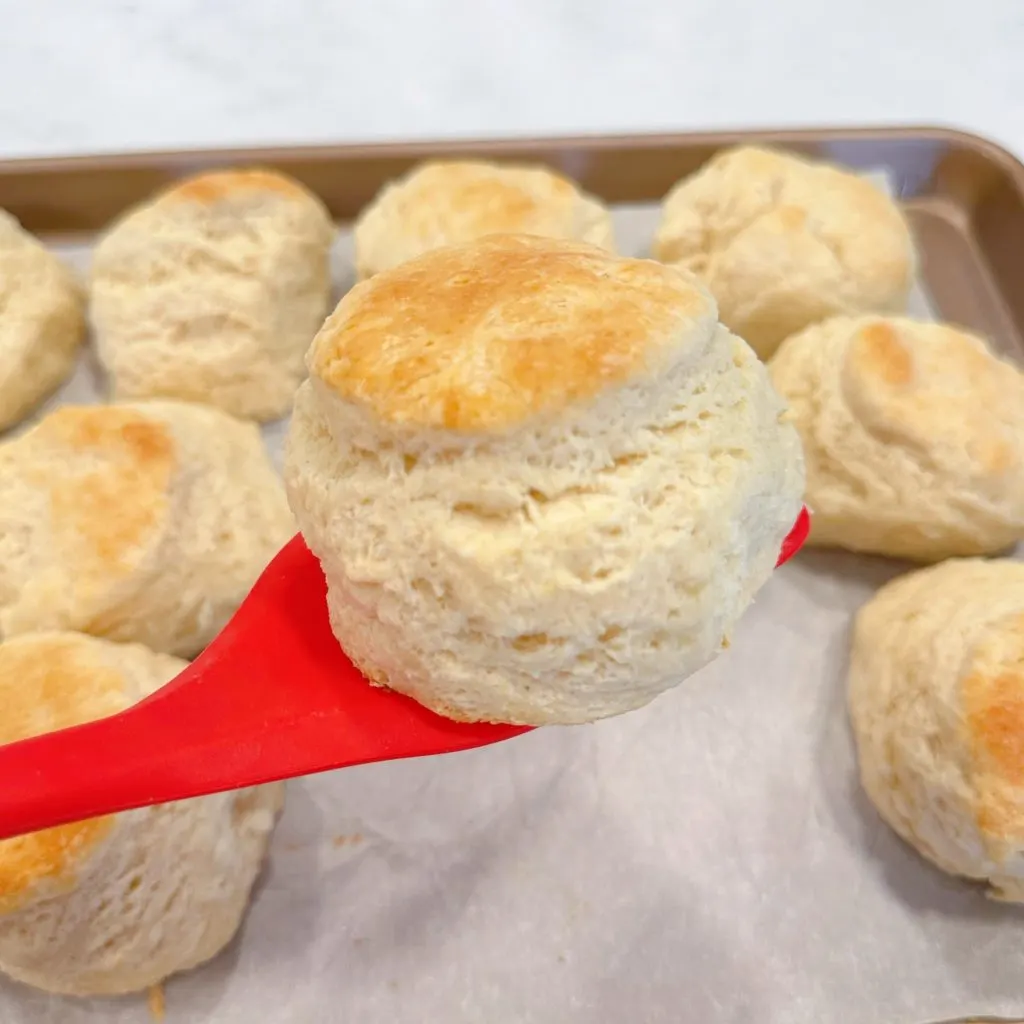
Place cut biscuits, bumped up against each other, on a baking sheet lined with parchment paper or silicone baking mat!
Let’s Talk! If you don’t have silicone baking mats…GET THEM! They are worth every penny, and they’re not expensive at all!

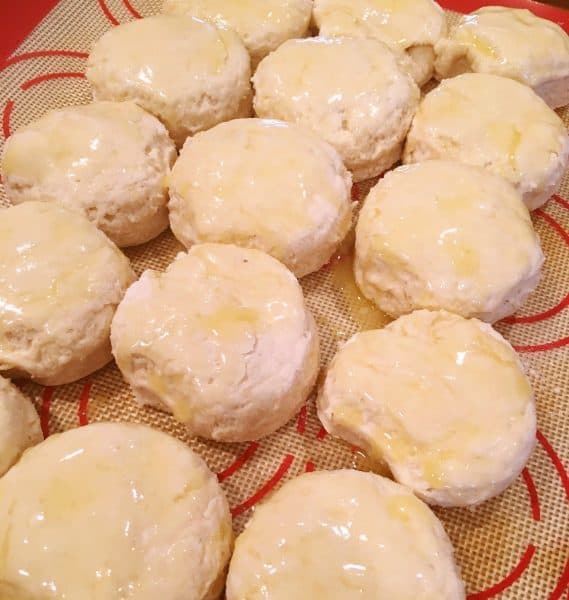
Preheat oven to 400° (F)
Melt 2 tablespoons of butter in a microwave-safe bowl. Brush each biscuit with butter. Oh, yeah baby! It’s getting real now! Look at those babies…see how fluffy they are? The baking powder is already doing its thang!

Bake 15–18 minutes until the edges are golden. Let them bake until the tops and edges are golden.
You’re going to flip when you see how high these biscuits rise! It’s like they’re reaching for the sky! They should double in size during baking. Isn’t that glorious? A truly beautiful biscuit!
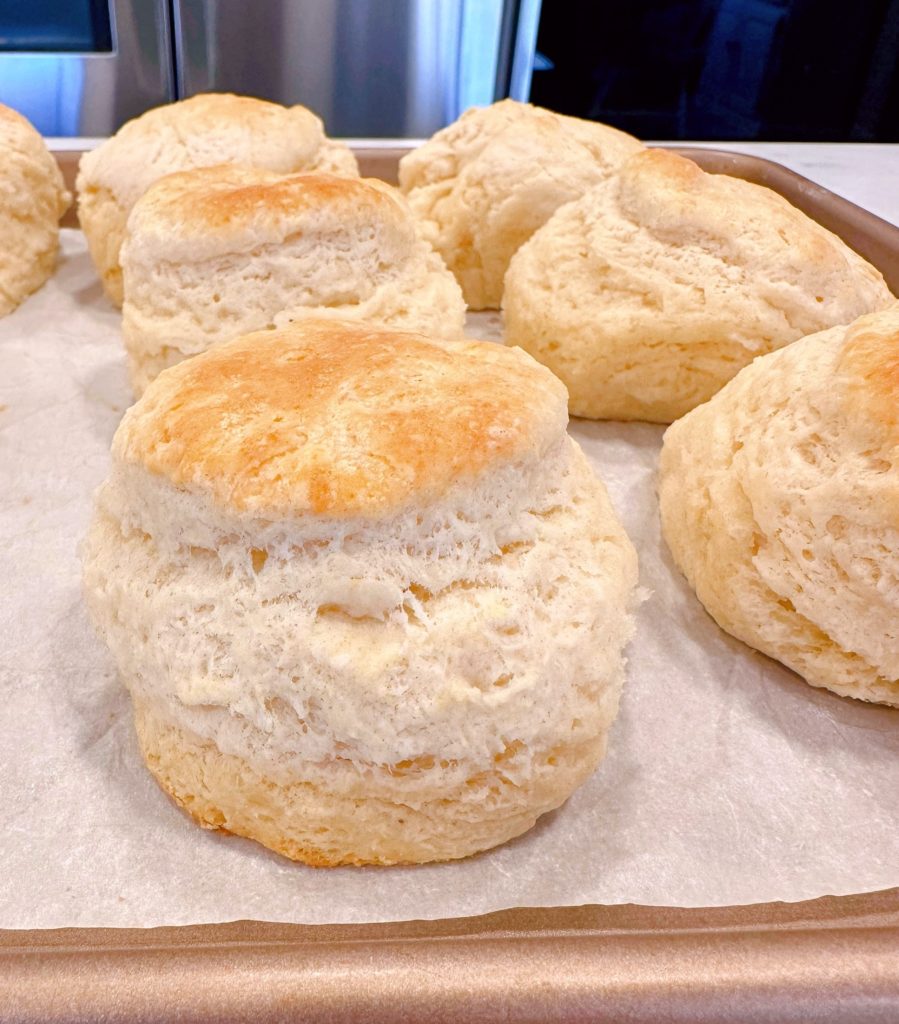

Remove from the baking sheet…try not to burn your hands! (I’m obviously speaking from experience! Lots of Experience!) I want to pull them off the minute they pop out of the oven! Can ya blame me?
Let’s just sit here and admire them for a second! Look at what you made! Biscuits!!!

Crack one open and watch the steam escape! They’re so tender and moist they melt in your mouth!
Top with big heaping slabs of butter and a scoop of your favorite jam or a hefty drizzle of honey. I swear my kids can put down an entire jar of Raspberry Jam with these biscuits! (Okay…maybe I help with that! Truthfully…wars are fought at this Nest over Raspberry Jam!)

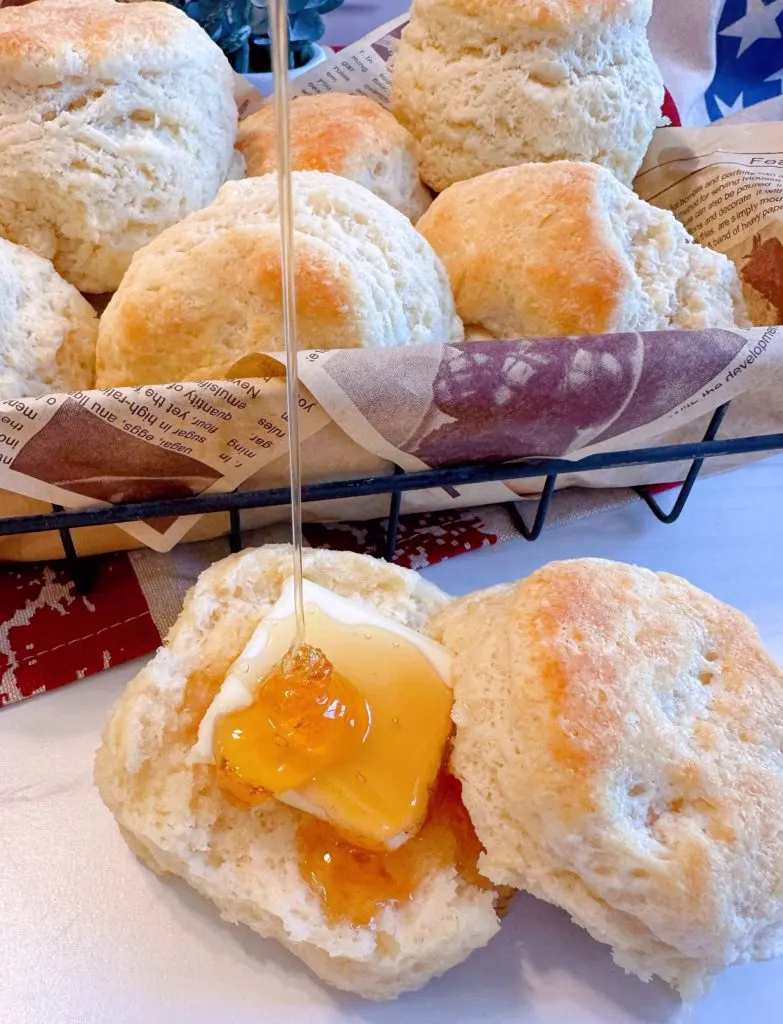
Do you see all those air pockets? Those are tiny little spaces of happiness and joy that mean you’ve created the BEST biscuit on the Planet!

They are so easy to make and such a favorite with the family! The leftovers make great breakfast sandwiches the next day…or midnight snacks…just sayin’! Let’s recap how to make the BEST biscuits EVER!
TIPS FOR MAKING GREAT HOMEMADE BISCUITS
- Make sure you cut the butter in until it resembles a coarse meal.
- Handle the dough as little as possible. Only Knead 8–10 times. Pat the dough into a circle. Don’t roll it.
- Brush with melted butter
- Bake on silicone or parchment lined baking sheet at 400°(F) degrees
- You can make the dough ahead of time by turning the dough out onto plastic wrap that is either floured, lightly buttered, or lightly sprayed with cooking spray. Roll up the plastic wrap until sealed, and refrigerate up to 24 hours.
- Store leftovers in an airtight container and re-heat in the microwave.
That’s all there is to it…easy-peasy! Truly amazing Homemade Baking Powder Biscuits!

Favorite Quick Bread Recipes
- Pecan Chocolate Chip Scones
- Best Pumpkin Buttermilk Biscuit Recipe
- Lemon Blueberry Quick Bread
- Buttermilk Bar Doughnut Recipe
- Traditional Indian Fry Bread
- Downeast Main Pumpkin Bread from Allrecipes.com
Remember you can always follow me on Pinterest, Facebook, and Instagram! I’d love to have you join me.
Thanks for stopping by my Nest! Have a GREAT day!


Printable Recipe Card


Easy Homemade Baking Powder Biscuits
Ingredients
- 4 cups all-purpose flour
- 2 tablespoon baking powder
- 2 teaspoons salt
- 2 tablespoons sugar
- 2/3 cup butter ice cold cubed, or frozen grated
- 1 ½ cup milk
- ½ cup buttermilk
- 2 tablespoons melted butter for brushing on top
Instructions
- Preheat oven to 400° degrees F (220 degrees C).
- In a large bowl, whisk together flour, baking powder, salt, and sugar.
- Cut in the grated butter until the mixture resembles coarse meal.
- Make a "well" in the center. Add milk and buttermilk. Stir gently until dough pulls away from the side of the bowl. Do NOT over mix.
- Turn out onto floured surface, and gently knead 8-10 times. Pat dough out to 1 inch thick. Cut biscuits with a large cutter or juice glass dipped in flour. Repeat until all the dough is used. Brush off the excess flour. Place biscuits on lined baking sheet.
- Brush with melted butter.
- Bake for 15-18 minutes in the preheated oven, or until edges begin to brown.
Notes
Nutrition
About the Author
Meet The Author


Hi! I'm Norine, the cook, baker, and recipe creator behind Norine's Nest. I love sharing and creating recipes that invite family, friends, and neighbors to gather around the dinner table. Sharing good food and creating memories with those we love brings me happiness. Thanks for stopping by my Nest!
Baked Chicken Cordon Bleu Casserole | Norine's Nest
Monday 23rd of May 2022
[…] with a fresh garden salad, string beans, and my Homemade Buttermilk Biscuits for a complete and satisfying meal! Any leftovers…if you get so lucky…reheat […]
Gail Marie
Sunday 19th of May 2019
Girl!!!! These are just like Granny's amazing biscuits! Yours look like heaven! I could almost smell all that biscuit goodness!
[email protected]
Monday 20th of May 2019
Gail!!! Hi sweet friend! Thank you so much for stopping by and visiting with me. That's a huge compliment to say these biscuits are like Granny's!!! I'm truly honored my sweet friend. Love all your recipes! You are such a talented cook! Have a Great week! Happy Nesting! Norine
Sunday 19th of May 2019
Creamed Turkey 'n' Biscuits | Norine's Nest
Friday 8th of February 2019
[…] powder biscuits! My favorite are the mine! (I know shocking! lol) You can find the recipe HERE, but feel free to use your own. I won’t be offended! I give you the step-by-step directions […]
Diane
Friday 1st of February 2019
Hi Norine-Love your posts! Very entertaining! My biscuits are really good...but these sound GREAT! BTW, I use my mom’s pastry blender & her cutter, which is...a cut-off can! ? Works great!
[email protected]
Sunday 3rd of February 2019
Hi Diane! Thanks so much! Can I just tell you how much I love the "cut-off" can tip!!! What an awesome idea and I would have NEVER thought of that! I'm going to pass that along to my followers! Such a great idea. Thanks for sharing with me. I hope you have great weekend! Stop by again and visit! Love hearing from fellow biscuit lovers! Happy Nesting! ~Norine