These Pumpkin Buttermilk Biscuits are a must-try during Fall. With their perfect blend of pumpkin and flaky, buttery, biscuit goodness, they’re an ideal addition to any autumn meal.
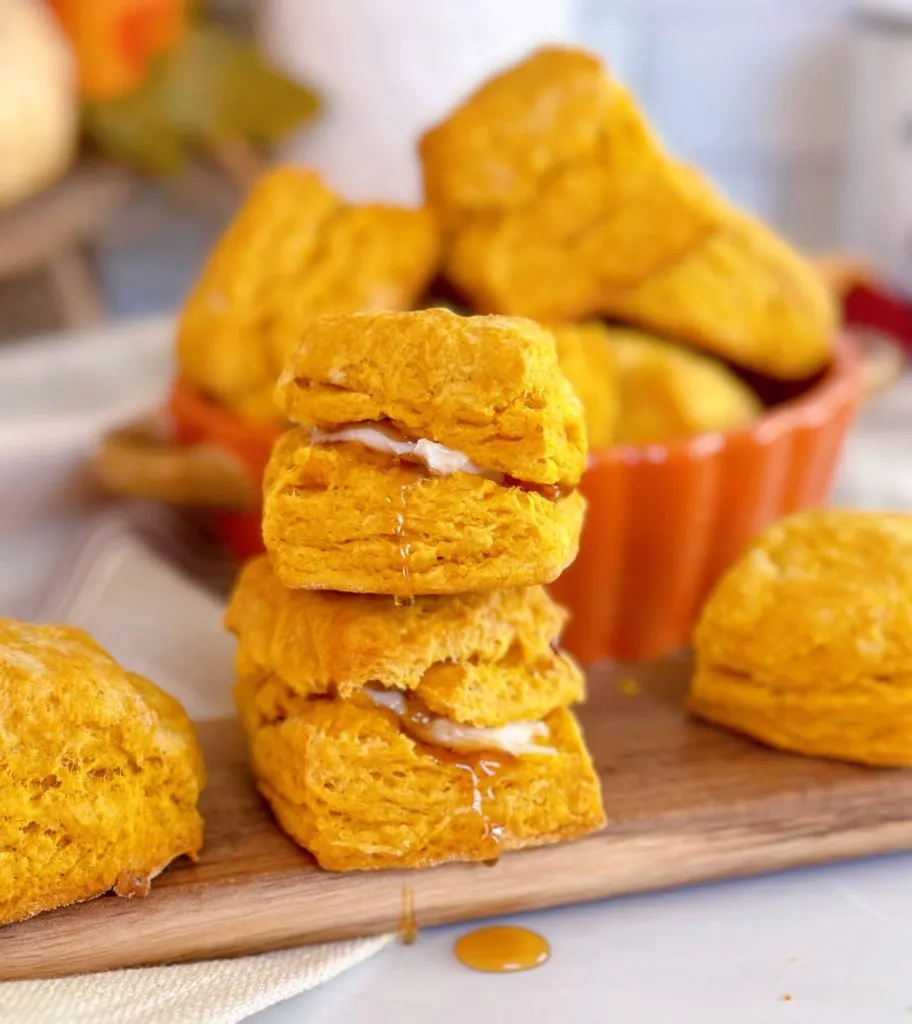
Fall is in the air, and what better way to celebrate the season than with a batch of warm, fluffy Pumpkin Buttermilk Biscuits? These biscuits are the epitome of comfort food, with a delightful twist that captures the essence of autumn.
There is nothing I love better than a big flaky buttermilk biscuit! So, when my grocery store monthly flyer arrived with a Pumpkin Biscuit Recipe, I knew I wanted to try them!
As I started researching Pumpkin Biscuits I quickly realized most contain added sugar and spices. That’s not a dinner biscuit! That’s a scone! I wanted a fluffy biscuit I could serve with a warm bowl of Homemade Chili, or it would pair beautifully with my Ground Beef Dinner in a Pumpkin!
After a little trial, and error, and tweaking of the original recipe from my grocery store… I have the perfect recipe for Buttermilk Pumpkin Biscuits. They are super tender, with just the right crumb, and ultra moist…thanks to the addition of Pumpkin Purée!
Whether you’re enjoying them for breakfast, as a side dish, or as a snack (who doesn’t love a biscuit snack?!), these biscuits are sure to become a seasonal favorite.
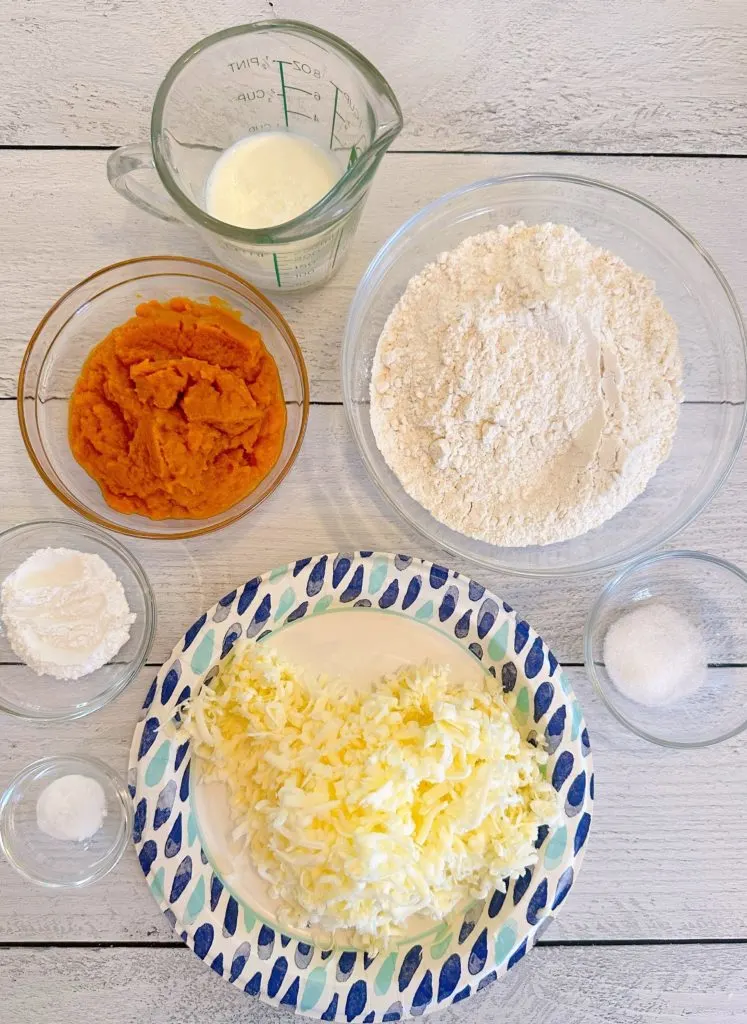
Ingredients for Pumpkin Biscuits
- 2 cups all-purpose flour, plus additional for dusting the work surface.
- 1 Tablespoon of baking powder
- 1 teaspoon salt
- ½ teaspoon baking soda
- ½ cup butter (1 stick or 8 tablespoons) – note you can use unsalted, but it isn’t necessary.
- 1 cup pumpkin purée – Please note this is NOT pumpkin pie filling!
- 1/3 plus 2 tablespoons of buttermilk
- Honey and Butter for toppings
Making Pumpkin Biscuits
Preheat the oven to 400° (F). Biscuits bake better at a high heat than most dinner rolls. Line a baking sheet with parchment paper, or use a silicone baking mat!
How to Make Better Biscuit Tips
Before we go any further…let me share a few helpful hints and tips for making homemade biscuits! If you’re a first-time biscuit baker, the entire process can seem overwhelming. But trust me when I say that this is an easy biscuit recipe, and if you follow my tips you’ll have the best results possible!
- Use ice-cold butter cut into small pieces, or frozen butter grated with your cheese grater. This makes for a fluffier biscuit. It also makes it easier to “cut” the butter into the flour. The butter also assists in the rising of the biscuits.
- Don’t over handle the dough! Too much kneading can cause gluten to develop in the flour, and will make the biscuit dough tough.
- Biscuits can be made from either soft or stiff doughs. Don’t be afraid to add more liquid if the batter is too dry. Add it one to two tablespoons at a time.
- Mix the dry ingredients using a whisk or fork. Make sure your baking powder is not caked in the can. If it is, sift it before adding it to the flour. Poorly mixed baked powder produces biscuits with bitter salty bits!
- Make a well in the center of your flour mixture for your wet ingredients. Mix with a wooden spoon, fork, rubber spatula, or your fingers, just until the dry ingredients are moistened, or nearly moistened. Do not expect a completely smooth dough!
- Cutting the biscuits into squares leaves no scraps and requires less handling of the dough.
Creating the Biscuit Dough
In a large mixing bowl, combine all the dry ingredients. 2 cups of all-purpose flour, baking powder, salt, baking soda, and butter.
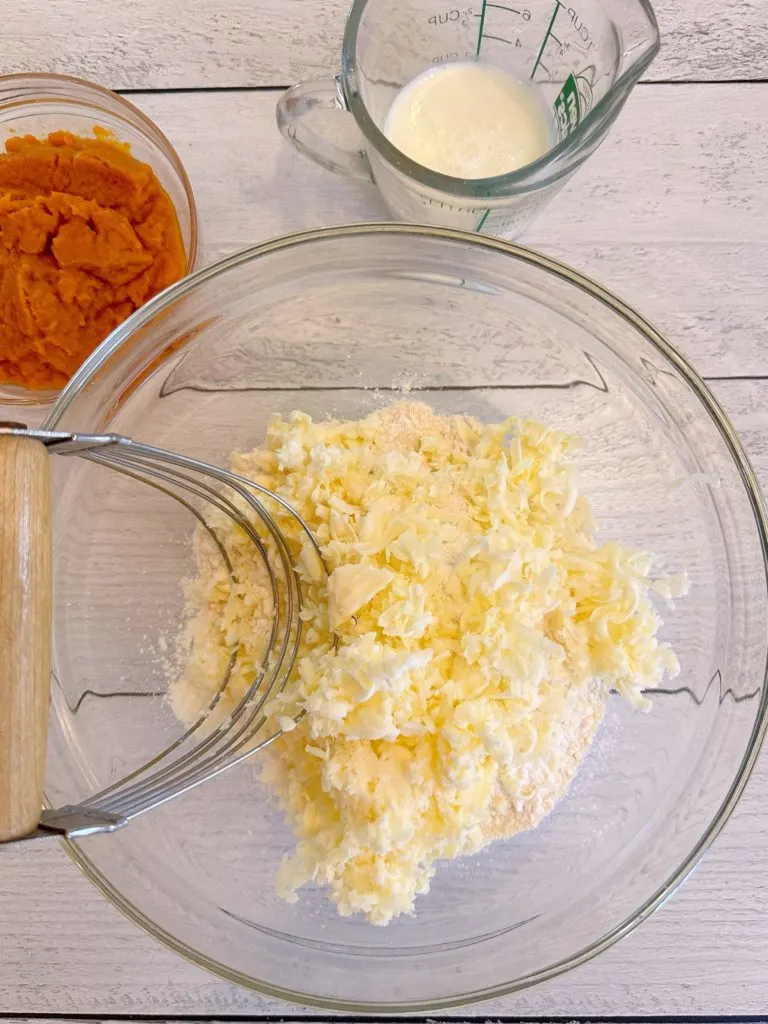
Cut the cold butter using a pastry blender. Continue cutting the butter until the mixture resembles coarse crumbs.
TIP: You can use a food processor to make these biscuits! Just pulse until the mixture resembles a coarse crumble. Remove from the food processor and continue the steps using a medium-sized bowl. I’m a country girl who likes to use a pastry blender and a wooden spoon! Just like grandma used to make her biscuits! (That’s my clever way of saying “I’m really,really, ancient”!)
Wet Ingredients
Add pumpkin and buttermilk to the flour mixture.
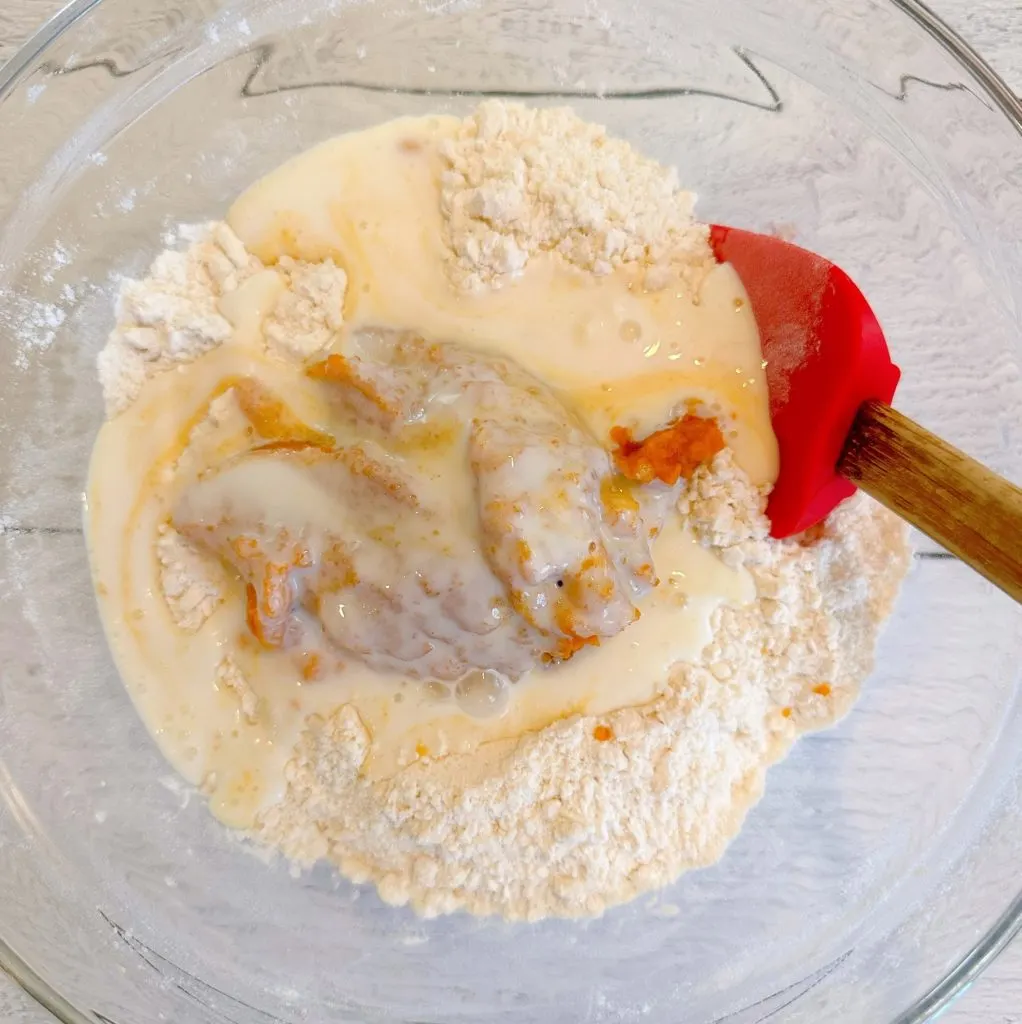
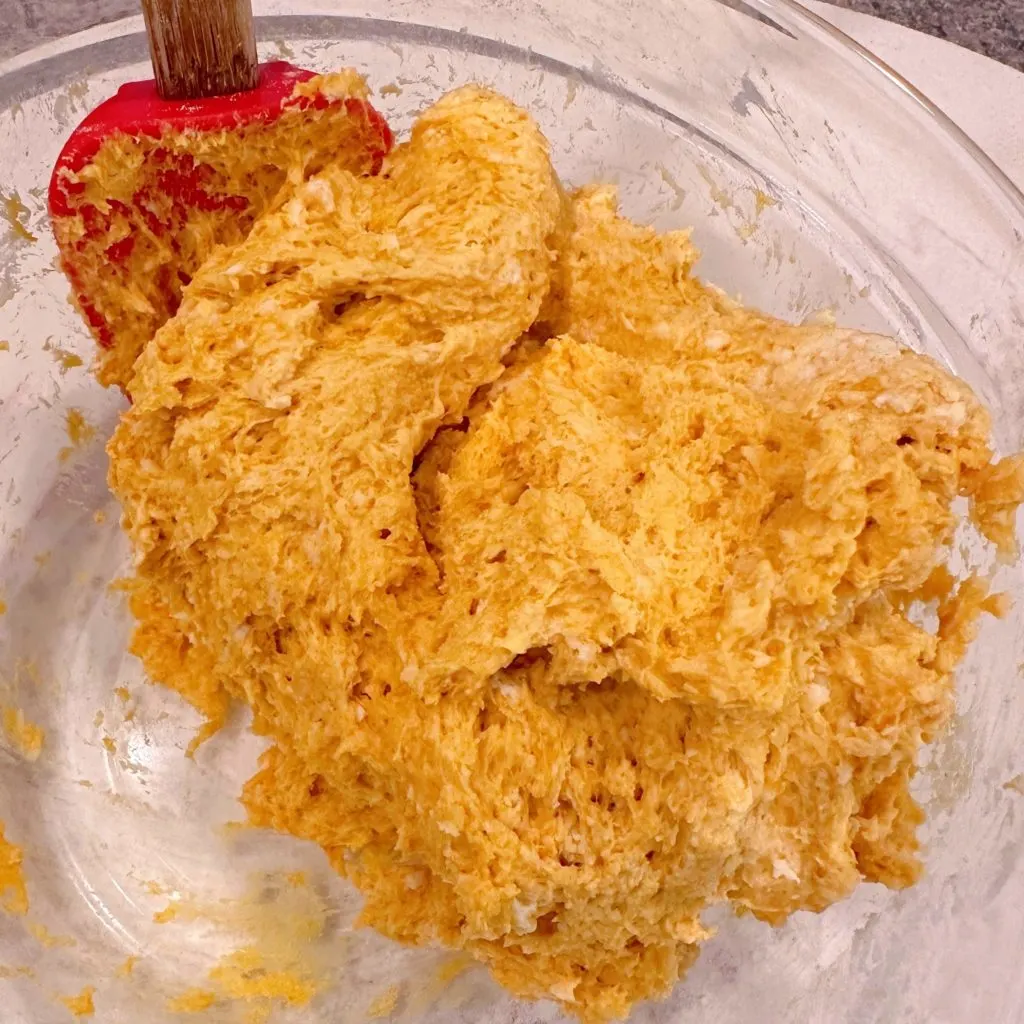
Stir with a fork, or rubber spatula, just until the dough comes together into a shaggy ball.
The dough will not be smooth. There will still be pea-sized bits of butter. THAT’S OKAY!! Please don’t eliminate those butter bits!
Forming Biscuits
Turn the biscuit dough out onto a well-floured surface. I like to use my dough disc, but your counter tops, generously floured, can be used.
Gently knead a few times. (If you’ve had a bad day…this isn’t the dough to take it out on!) Pat dough into a square approximately 1-inch thick.
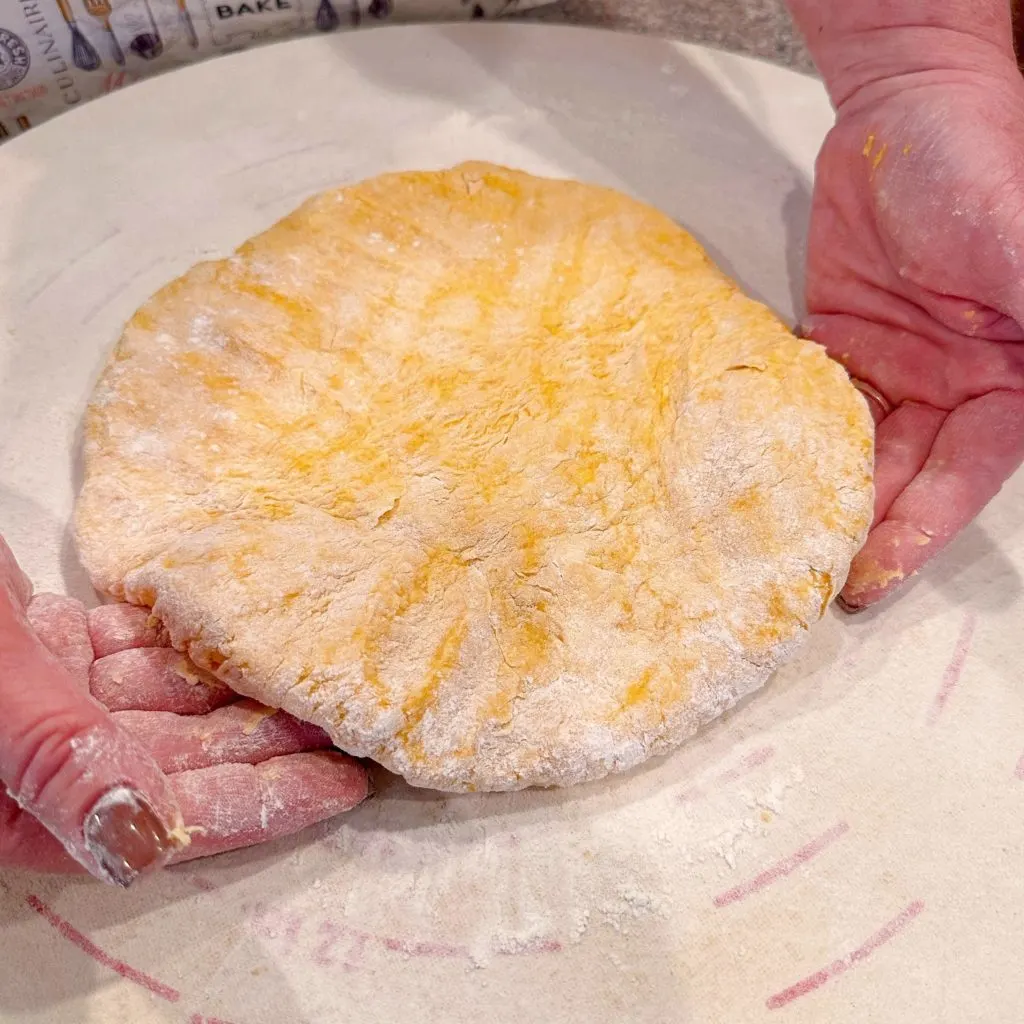
Fold the dough in half, then turn it a quarter-turn, and fold the dough in half again. This creates beautiful layers in your biscuits!
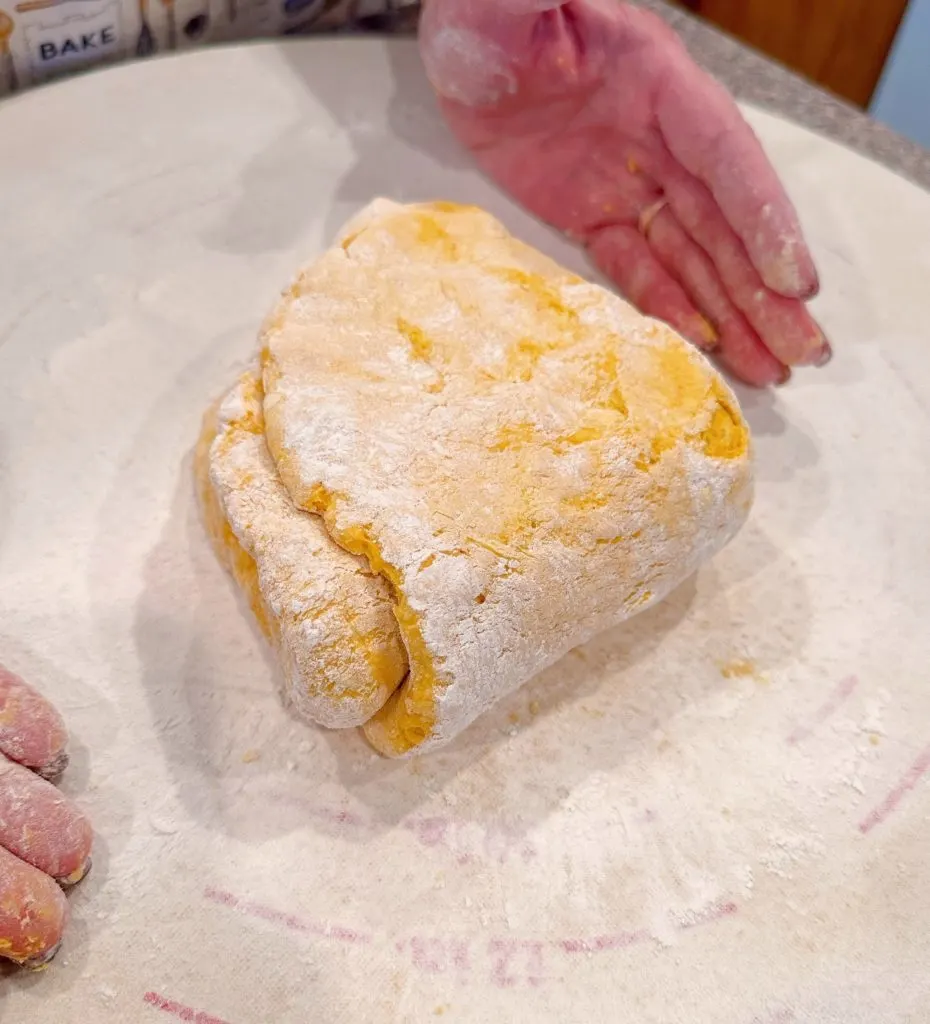
Pat or roll the dough into a 1-inch thick rectangle. Picture a 3×4 grid. Using a sharp knife, mark 12 equal squares for biscuits.
TIP: There are different shapes for biscuits. You can use a biscuit cutter to make them round, or various shapes. There are “drop” biscuits that are made simply by dropping large spoonfuls of dough onto a prepared baking sheet and there are “cut” biscuits.
I love square cut biscuits! Every bit of dough is used, and it’s a simple method of creating nice evenly proportioned biscuits.
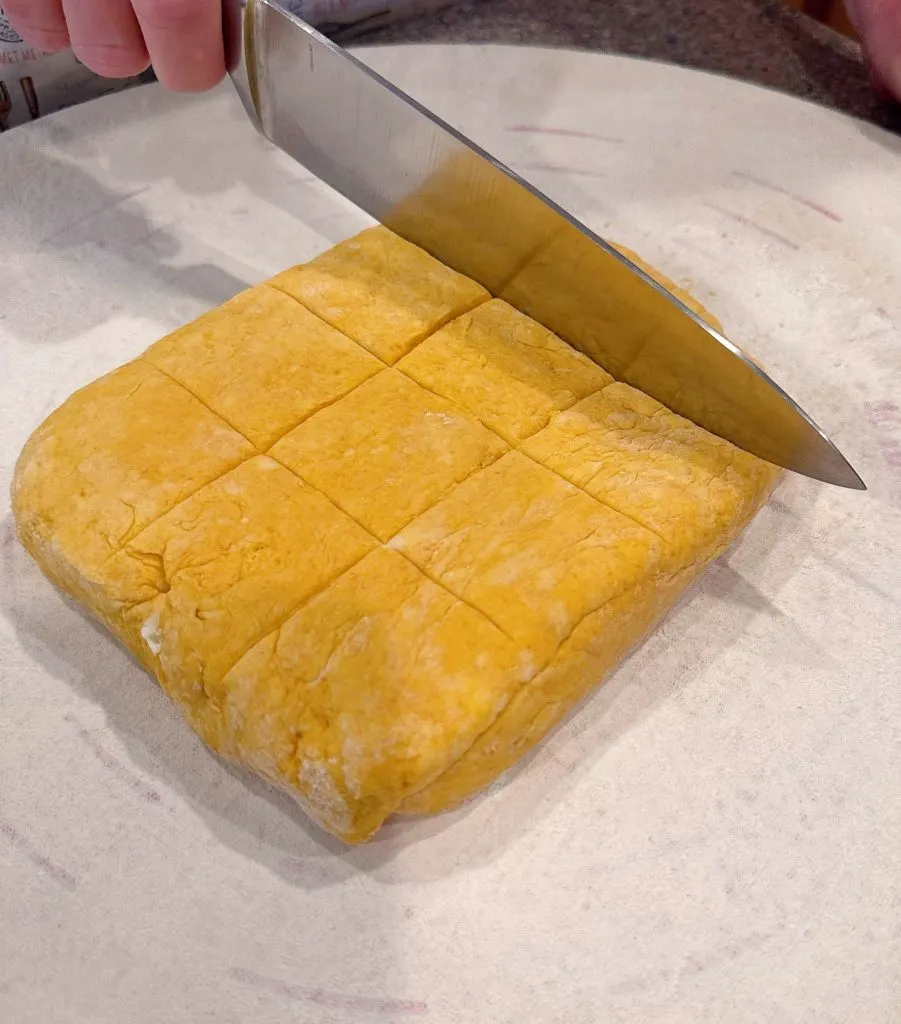
Once the biscuits are marked, and you’re happy with the division of the dough, cut into 12 individual biscuits.
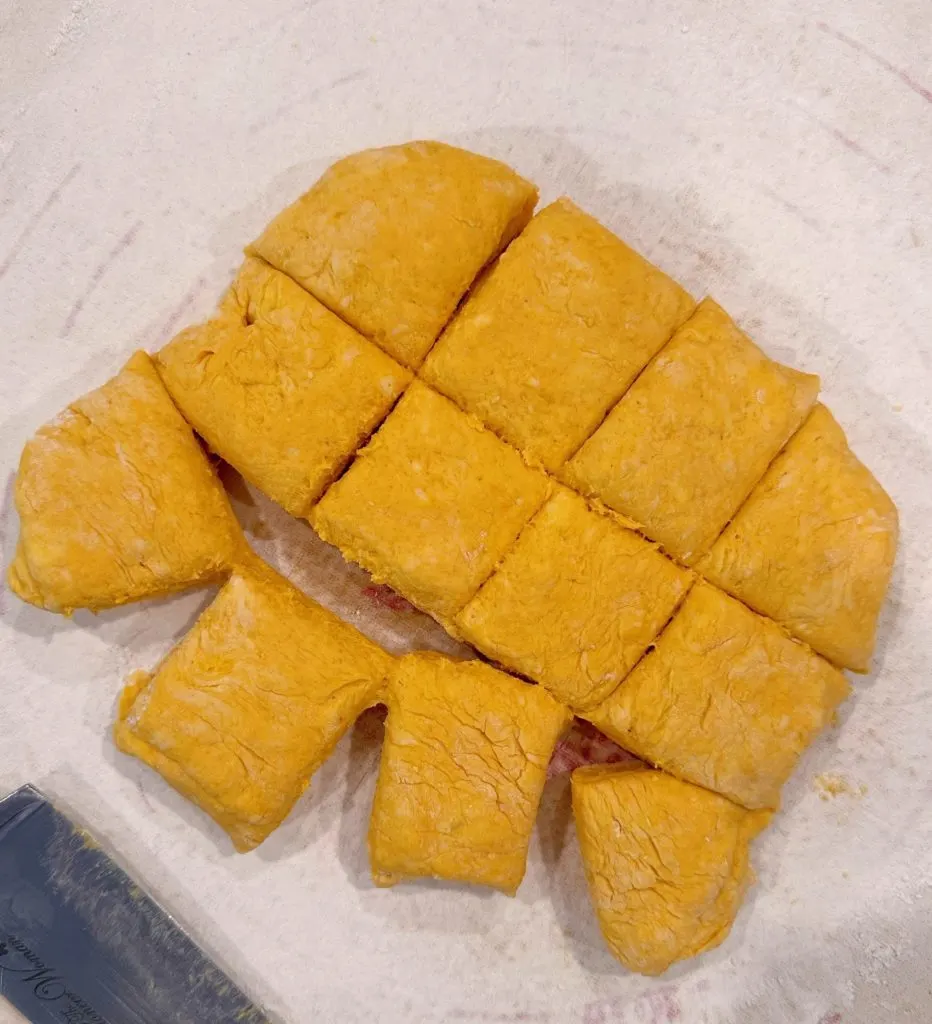
Arrange biscuits on the prepared baking sheet. If you have time, place the baking sheet in the freezer for 10 minutes.
TIP: You don’t want frozen biscuits. This is used to firm the butter back up, creating extra fluffy buttermilk biscuits. It’s a quick “chill” of the dough before baking.
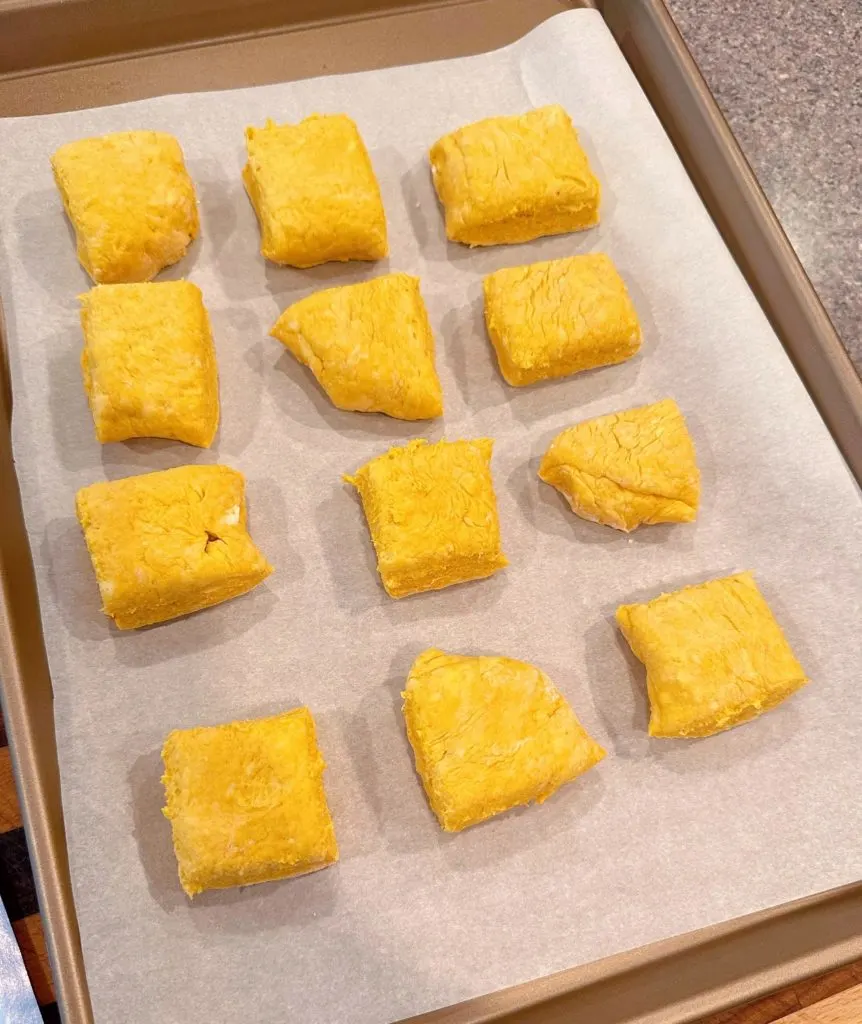
Bake the chilled biscuits for 20–25 minutes, or until golden grown. Allow the biscuits to cool at least 5 minutes before serving. This helps prevent the insides from being “gummy”.
If desired, brush the top of each biscuit with melted butter.
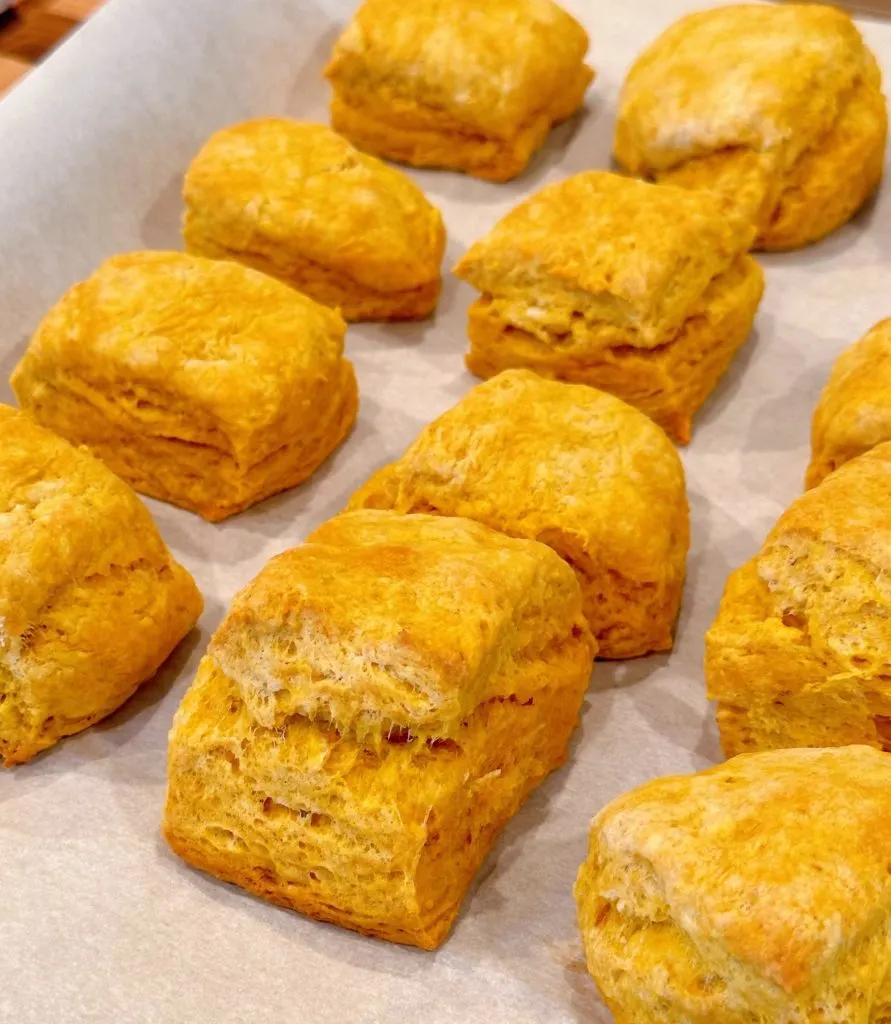
Serve warm, or at room temperature, with a little butter and honey!
There’s nothing better than warm biscuits with butter, honey, maple syrup, apple butter, or a side jar of pumpkin butter! A dab of cranberry sauce isn’t bad either! (Obviously, I’ve tried every topping known to biscuits and humanity!)
Any extra biscuits can be stored in an airtight container for up to 3–4 days. Reheat in the microwave for 20 seconds.
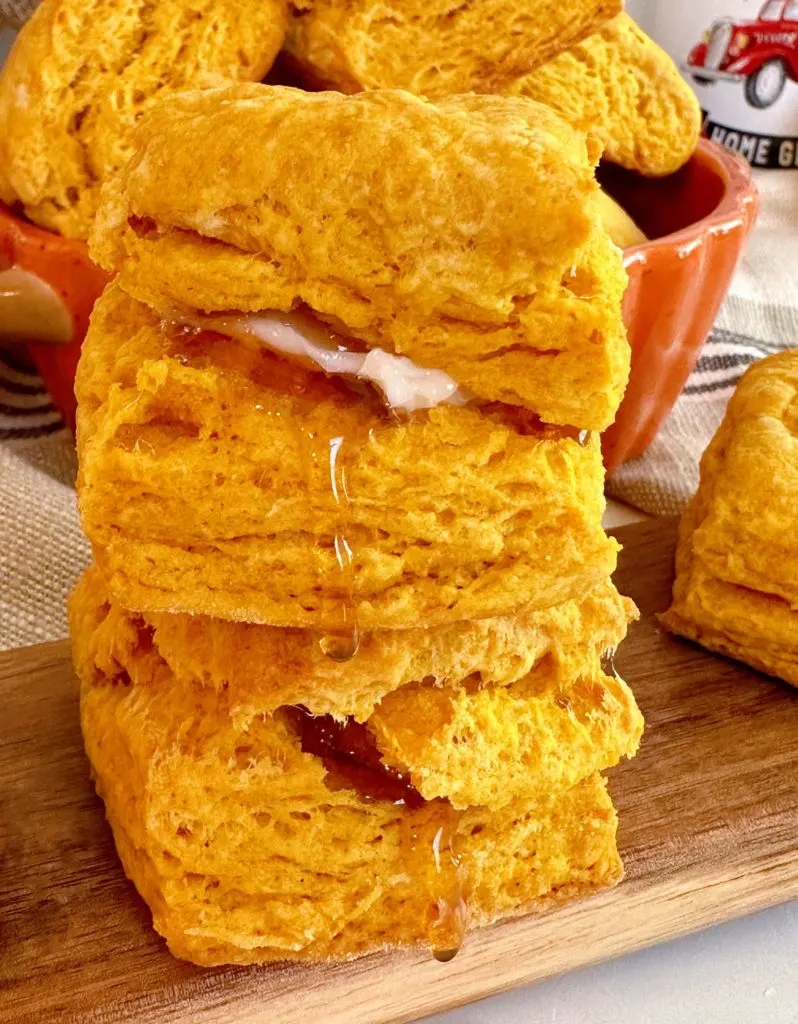
These biscuits are wonderful with their subtle pumpkin flavor. Look at the height and fluffy texture of these biscuits. They are glorious! And you’re a pastry chef! Go team biscuits!
Next time you want a superb biscuit…you’ll know exactly what to do and what recipe to use! (Let’s make room for our humility! Lol I say “Own it”! Be proud of your skills!)
Other Favorite Quick Bread Recipes
- Oatmeal Pumpkin Scones
- Traditional Irish Soda Bread
- Bakery Style Cranberry Orange Muffins
- Cranberry Eggnog Bread with vanilla glaze
- Easy Homemade Baking Powder Biscuits
- 100% Whole Wheat Buttermilk Biscuits from A Red Spatula
Whether you enjoy them as part of a cozy brunch or as a side dish to your Thanksgiving dinner feast, these biscuits will be a hit with family and friends alike. This Fall recipe is sure to become a traditional favorite at your Nest!

Best Pumpkin Buttermilk Biscuit Recipe
Ingredients
- 2 cups all-purpose flour plus more for dusting work areas
- 1 Tbsp. baking powder
- 1 tsp. salt
- ½ tsp baking soda
- ½ cup cold butter cut into small cubes, or frozen and grated
- 1 cup pumpkin purée
- 1/3 cup plus 2 Tbsp Buttermilk
- Honey
Instructions
- Preheat oven to 400 °F. Line baking sheet with parchment paper or silicone baking mat. Set aside.
- In a large bowl combine 2 cups of flour, baking powder, salt, baking soda and cold butter.
- Using a pastry blender, cut butter into dry ingredients until mixture resembles coarse crumbs, with some pea-size pieces of butter remaining.
- Create a "well" in the center of the flour mixture. Add pumpkin and buttermilk; stir with a fork or rubber spatula until dough comes together in a shaggy ball.
- Turn dough onto a well-floured surface, knead a few times. Pat dough into a square approximately 1-inch thick. Fold dough in half, then turn a quarter-turn and fold in half again.
- Pat or roll dough into 1-inch thick rectangle. Picture a 3×4 grid and mark the dough with a sharp knife before cutting into individual biscuits. Arrange biscuits on prepared baking sheet and, if time permits, place baking sheet in freezer 10 minutes.
- Bake chilled biscuits 20–24 minutes, or until gold brown. Allow biscuits to cool at least 5 minutes before serving. This helps prevent the insides from being gummy. Serve warm or at room temperature with butter and honey. Store any leftover in an airtight container.
Nutrition
Meet The Author
Hi! I'm Norine, the cook, baker, and recipe creator behind Norine's Nest. I love sharing and creating recipes that invite family, friends, and neighbors to gather around the dinner table. Sharing good food and creating memories with those we love brings me happiness. Thanks for stopping by my Nest!

